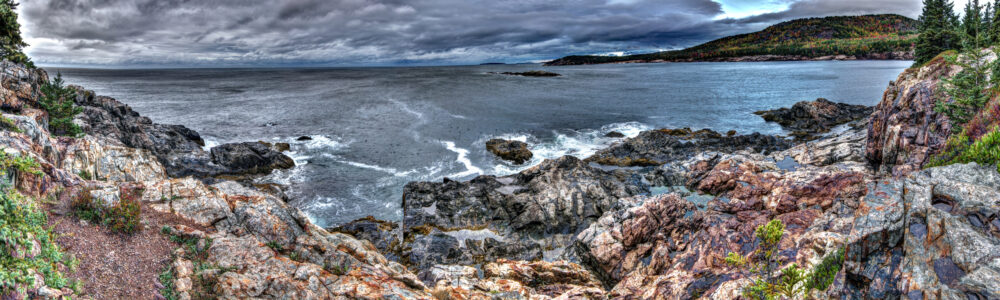
Many think that good weather is a must for great landscape photos. That’s just wrong! Bad weather can actually make your pictures better. Have you ever seen a photo where a storm seems to give the landscape more drama? It might seem hard to believe, but bad weather photography can make for amazing landscape photos. Don’t let rain or snow keep you inside. Be prepared. Here we go through some point to make photography in bad weather a more successful venture.
Gear Up: Essential Equipment for Weather-Resistant Photography
Shooting in bad weather means getting ready. The right gear keeps you and your camera safe. You might be surprised at how much difference this makes.
Weather-Sealed Camera and Lenses
A camera with weather sealing is almost a necessity. These sealed cameras are built to fight off rain and snow. They often have great weather sealing. This will allow you to stay out longer and in worse conditions, giving you the maximum opportunity to be in the right place at the right time for the killer photo.
How do you know if your lens is sealed? Check the lens specs. Many lenses say “weather-resistant” or “weather-sealed.”
NOTE: Weather resistant DOES NOT MEAN weather sealed.
Protective Gear for Yourself
Your camera isn’t the only one that needs protection. Dress in layers. This lets you adjust to changes in temperature. Have a waterproof outer layer that breathes to help remove moisture. This will keep you dry on the outside and the inside. Don’t forget gloves! Cold hands make it hard to use your camera. Sturdy waterproof boots are a must too. You don’t want to slip and fall.
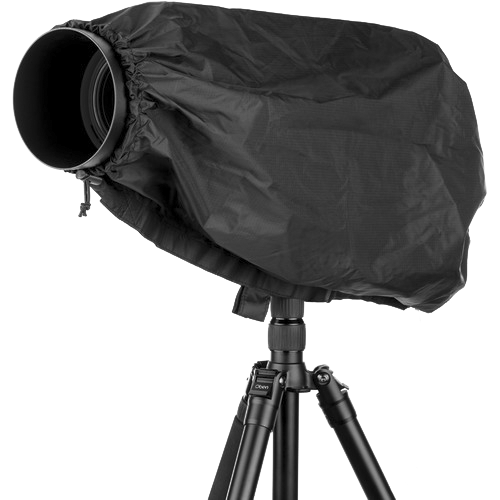
Rain Covers and Protection for Your Gear
Rain covers are a cheap way to protect your camera. These covers slip over your camera and lens. They keep rain off while letting you shoot.
Waterproof bags are also a good idea. You can keep extra gear in them. If a big storm hits, you can quickly pack up your camera. This protects it from water damage.
Tripod Stability
Wind can shake your tripod. This can blur your photos. To steady your tripod, add weight to it. Many tripods have a hook at the bottom. Hang your camera bag from the hook.
Widen the tripod’s stance. This makes it more stable. Push the legs into the ground for a better grip. Now your camera can stand up to wind.
Mastering Exposure in Challenging Conditions
Bad weather can trick your camera’s light meter. Learn how to get the right exposure. It’s easier than it seems.
Understanding Your Camera’s Metering Modes
Metering modes tell your camera how to measure light. Evaluative metering looks at the whole scene. It’s good for most situations. Center-weighted metering focuses on the center. It’s good for portraits. Spot metering measures light in a small area. It’s good for tricky light.

In snow, evaluative metering can underexpose the scene. The camera sees all the bright snow and thinks it’s too bright. Switch to spot metering. Measure the light on a grey or dark object. This will give you a better exposure.
Manual Mode Mastery
Manual mode gives you full control. You pick the shutter speed, aperture, and ISO. This lets you get consistent exposure.
In bad weather, light can change fast. Manual mode helps you keep up. You can adjust settings as needed. This way, your photos will look the way you want.
Using Histograms to Avoid Clipping
A histogram is a graph that shows the tones in your photo. It tells you if your image is too bright or too dark. The left side shows shadows. The right side shows highlights.
If the histogram is pushed to the left, your image is underexposed. If it’s pushed to the right, it’s overexposed. You want the histogram to be balanced. This means you have details in both shadows and highlights. If the graph is jammed to one side, you are clipping. Clipping loses detail.
Composition Techniques for Dramatic Weather Scenes
The way you frame your shot can make a big difference. Learn how to use composition to show off the weather. It’s a fun way to be creative.
Utilizing Leading Lines and Foreground Elements
Leading lines guide the viewer’s eye. They draw you into the photo. Roads, rivers, or fences can be leading lines. Use them to point to your subject.
Foreground elements add depth. Rocks, flowers, or trees can be foreground elements. They make the scene feel more three-dimensional. They also give the viewer a sense of scale.
Seeking Out Contrasting Elements
Contrast makes your photos pop. Look for contrast between the weather and the landscape. Dark rocks against snow create contrast. A bright rainbow against a dark sky does too.
Contrast can also come from colour. Red and green are contrasting colours. Use them to make your photos more interesting.
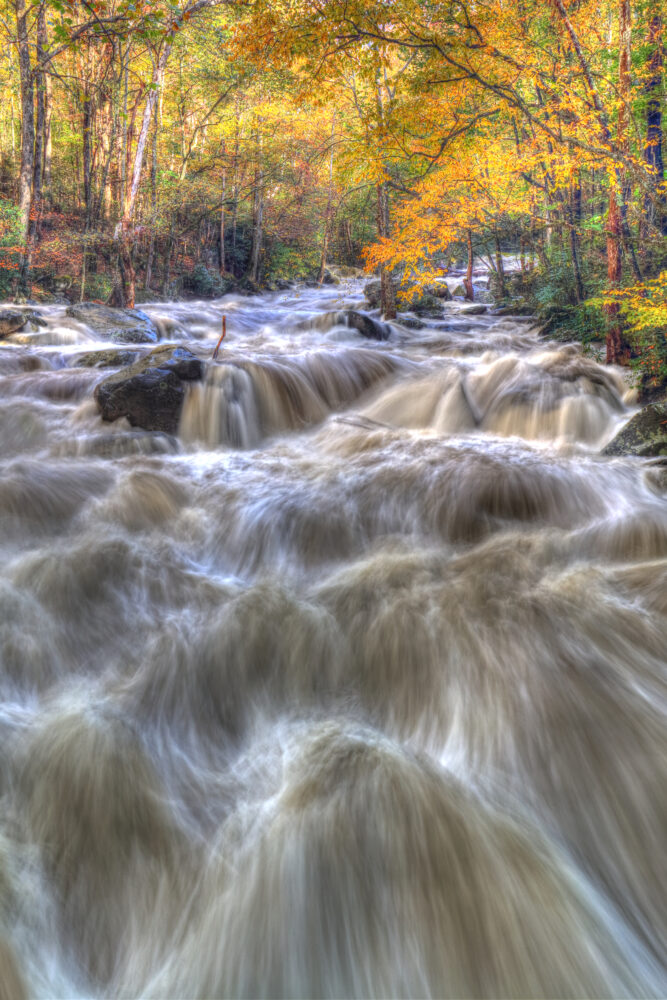
Capturing Movement in Weather Patterns
Shutter speed controls how long the camera’s sensor is exposed to light. A fast shutter speed freezes motion. A slow shutter speed blurs motion.
Use a slow shutter speed to show the movement of clouds. This will make them look soft and dreamy. Use a fast shutter speed to freeze raindrops. This will make them look sharp and clear.
Post-Processing for Bad Weather Photos
Post-processing can make your photos even better. The key is to keep it natural. Don’t overdo it.
White Balance Adjustments
White balance corrects colour casts. Overcast skies can make photos look blue. Snow can make them look cold.
Adjust the white balance to fix these problems. Warm up the colours to make the scene feel more inviting. Cool down the colors to make it feel more dramatic.
Contrast and Clarity Adjustments
Contrast makes details stand out. Clarity enhances texture. Use these sliders to bring out the details in your photos.
Be careful not to overdo it. Too much contrast can make your photos look harsh. Too much clarity can make them look fake. A little goes a long way.
Noise Reduction Techniques
High ISO settings can add noise to your photos. Noise looks like grain. It can make your photos look bad.
Use noise reduction to fix this. Most photo editing programs have a noise reduction tool. Use it sparingly. Too much noise reduction can make your photos look soft.
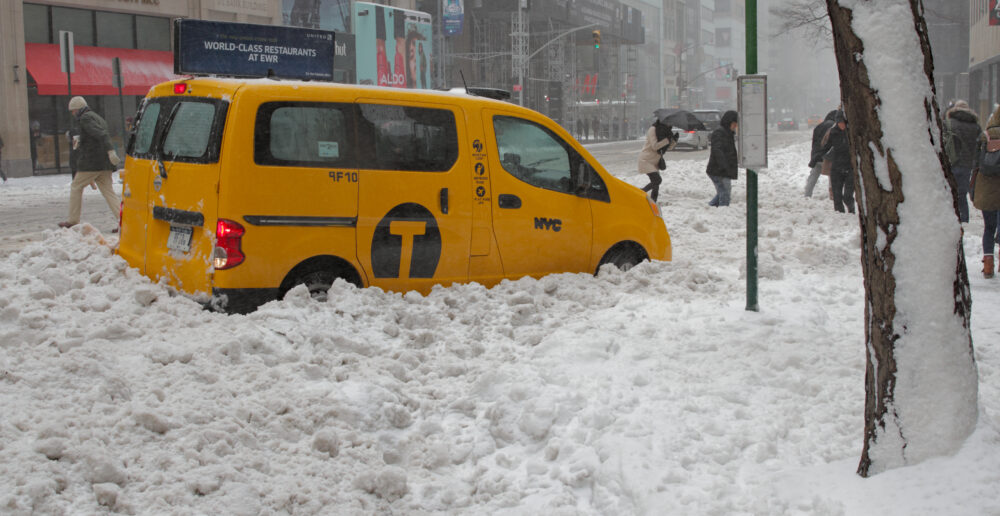
Safety First: Prioritizing Your Well-Being in Bad Weather
Your safety is important. Bad weather can be dangerous. Don’t take risks for a photo. Also, think about how easy it will be to travel around.
Checking Weather Forecasts
Always check the weather before you go out. Know what to expect. Be aware of any warnings. I use a dew different apps and monitor them regularly when out photographing –
Avoiding Dangerous Situations
Slippery slopes are dangerous. Lightning strikes are too. Flash floods can happen fast. Be aware of these dangers.
Stay away from the edge of cliffs. Don’t stand under trees during a lightning storm. Don’t cross flooded rivers. A dry river bed or trickling stream can turn into a raging torrent in no time at all.
Emergency Planning
Carry a first-aid kit. Know your location. Tell someone where you are going.
If you are within cell service ensure that your phone is charged and with you. Sometimes we are off the beaten path with no cell service. Think about a personal tracker, maybe one with a satellite plan for emergency messaging.
If something goes wrong, you’ll be ready. It’s always better to be prepared. Your life is worth more than a photo.
Conclusion
Bad weather can make for amazing landscape photos. It’s all about being prepared and knowing how to use it to your advantage. With the right gear and skills, you can capture dramatic scenes that others miss.
Don’t be afraid to go out in bad weather. Embrace the challenge. You might be surprised at what you capture.
What are your favorite bad weather locations? Share your photos! Let’s see what amazing images you can create.
A Selection Of Guide Articles
Adapting A Vehicle For Landscape Photography
We talk about the thought process and steps we took to make life easier when adapting a vehicle for landscape photography
RAW Format Photography
Understanding Camera RAW format files and why they are best for photographers wanting optimal image quality and processing flexibility
Mastering Exposure
Mastering exposure requires understanding of the three principal mechanisms: shutter speed, aperture size, and the photographic material's level of sensitivity to light (ISO)
Essential Filters for Landscape Photography
Read about the essential filters for landscape photography to make your life easier and take your images to the next level
How To Photograph Winter Landscapes
How to photograph winter landscapes, gear, what you need to consider and understanding the how snow affects light
Planning A Photography Roadtrip
A guide to planning a photography roadtrip. How to find locations, what to pack and tips to get the most from your trip
Create Dramatic Landscape Photos
Luck, light, skill and perseverance are just some of the facets needed to create dramatic landscape photos
Landscape Photography: Portrait vs. Landscape Orientation
Comparing composition techniques and when to use landscape versus portrait orientation