Ever seen a photo where a person or object is just a dark shape against a bright, colourful sky? That’s silhouette photography and it can be super powerful. It’s like visual poetry, using light and shadow to tell a story. The best part? You don’t need fancy gear to try it. Silhouette photography is something anyone can do. This article shows you how to take awesome silhouette photos. We will cover everything from light to putting the shots together. Let’s get started!
Understanding the Fundamentals of Silhouette Photography
Before you start snapping pics, understand the basics. These principles create stunning silhouettes.
What is a Silhouette?
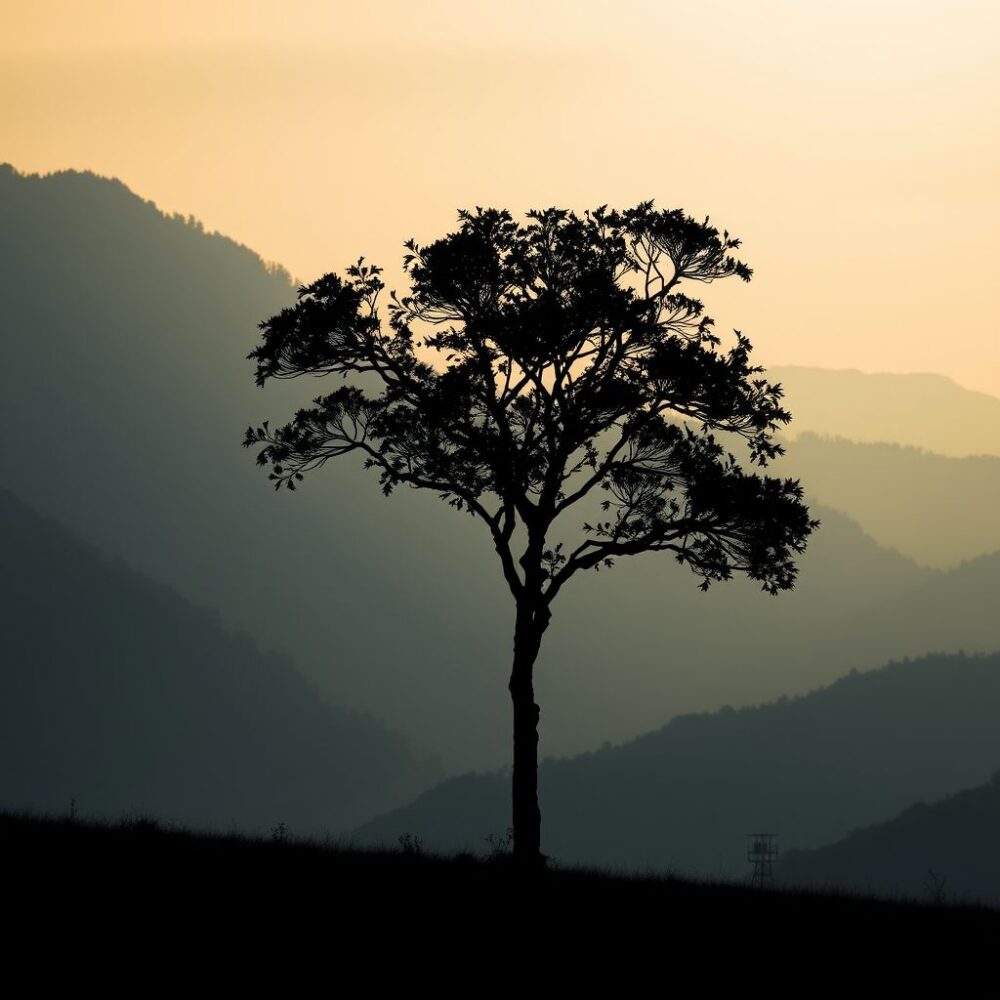
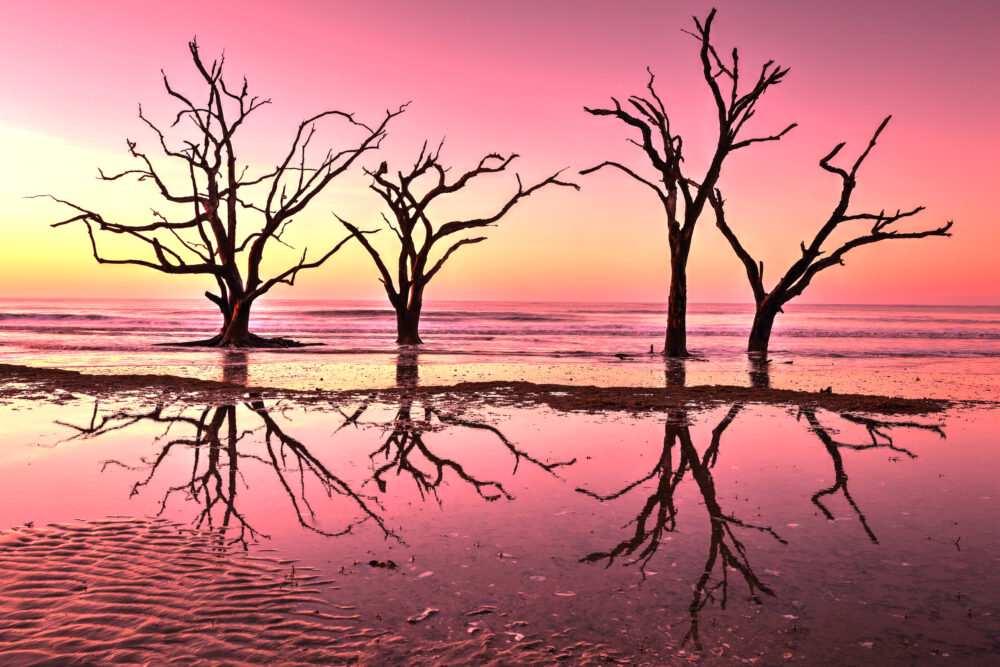
A silhouette is a dark outline of a subject against a brighter background. Think of it as a shadow picture. Key things are a dark subject, a bright background, and a clear shape. No details are visible in the subject, only its form.
The Importance of Strong Backlighting
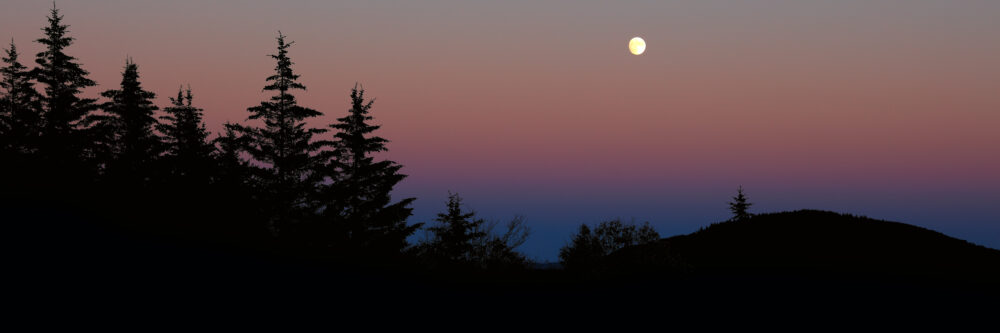
Backlighting is what makes a silhouette happen. The light source needs to be behind your subject. This makes the subject appear dark against the bright light. The sun is great, but a bright sky or even a lamp can work. Night time shots with moon or stars work incredibly well too.
Choosing the Right Subject
Some things work better as silhouettes. Look for shapes you can easily recognize. A tree, a person in action or an animal are good choices. If you can get the animal to stay still long enough! Avoid things that overlap too much or have messy outlines. Clean, simple shapes create the most impact.
Gear and Camera Settings for Silhouettes
You do not need the most expensive gear. However, understanding how to use it is key.
Essential Equipment: Camera, Lens, and Tripod
You can use any camera, even your phone. A DSLR or mirrorless camera gives you more control. Learn how to use manual mode for ultimate control. Almost any lens works. A tripod helps keep your camera steady. This is useful, especially when it’s darker.
Camera Settings: Aperture, Shutter Speed, and ISO
Set your camera for the best silhouette. Use a narrow aperture, like f/8 or higher. This makes sure everything is sharp. Adjust the shutter speed so the background is bright. Keep the ISO low (like 100 or 200) to avoid grainy photos. Keep an eye on your histogram to prevent clipping.
Focusing Techniques
Focus on the background, not the subject. This makes sure the bright area is sharp. Your subject will naturally be a dark, blurry shape. You can use manual focus or lock the focus on the background.
Mastering Composition for Impactful Silhouettes
How you put things in the frame can make or break the shot. Let’s check out some composition techniques.
Rule of Thirds and Leading Lines
The rule of thirds helps you place your subject. Imagine dividing your frame into nine equal parts. Put your subject where the lines cross. Leading lines, like a road or fence, can draw the viewer’s eye to the silhouette.
Negative Space: Creating a Sense of Depth
Negative space is the empty area around your subject. Using lots of negative space makes your silhouette stand out. It gives a feeling of drama and isolation. The subject can breathe when it’s surrounded by space.
Framing the Subject: Using Natural Elements
Use things like trees or arches to frame your silhouette. This adds context to the picture. It also creates a border around the subject, which focuses attention. These natural frames make the shot more interesting.
Finding the Perfect Light and Location
Where and when you shoot matters a lot. You will learn to find great light and places.
The Golden Hour and Blue Hour
The golden hour is right after sunrise and before sunset. The light is warm and soft. The blue hour is right before sunrise and after sunset. The light is cool and soft. Both times are awesome for silhouettes because of the vibrant sky.
Scouting Locations: Identifying Potential Backdrops
Look around for interesting places to shoot. Mountains, oceans and city skylines make great backdrops. Find places with open views and interesting shapes. The key is to grab the viewer’s attention.
Utilizing Artificial Light Sources
You can make silhouettes with streetlights or spotlights. These lights can create cool effects at night or inside. Experiment with different light sources to see what you can create.
Post-Processing Techniques for Silhouettes
Editing can make your silhouette photos even better. Let’s see how to enhance and adjust your photos.
Enhancing Contrast and Brightness
To get the best results you will need to edit your images. It doesn’t matter what your preferred editing software is as long as it gived you the controls required. We use a mix of Photoshop, Photomatix, Darktable and Gimp.
Increase the contrast to make the subject darker and the background brighter. Adjust the brightness of the background to make it pop. You may also want to adjust vibrance and saturation, but ensure that the last two are done without making the picture look to unnatural. Applying a mask or gradient to the tweaks can also help to separate the objects for a sharper, bolder result.
Adjusting Black and White Levels
Adjust the black and white levels to clean up the silhouette. This makes the dark areas pure black and the light areas pure white. It creates a cleaner, more defined silhouette. If necessary fill any gaps in the silhouette, or where shadows show slight detail.
Removing Distractions
Get rid of anything that takes away from the main subject. This could be unwanted objects or spots in the background. Compositional rules still apply. Removing these distractions makes the silhouette the main focus.
Conclusion
Silhouette photography is a fun and easy way to take dramatic photos. Remember to use backlighting, pick simple subjects and play with composition. If you shoot as the light is changing then be aware of your surroundings. Take care if you are walking in or out of the lcoation in the dark. Always consider your safety. Whether you have a fancy camera or just a phone, you can create stunning images. So grab your camera, find some light, and start experimenting.
A Selection Of Guide Articles
Using Reflections In Landscape Photography
We look at how to best use reflections in landscape photography as the method to add symmetry to you compositions
Adapting A Vehicle For Landscape Photography
We talk about the thought process and steps we took to make life easier when adapting a vehicle for landscape photography
RAW Format Photography
Understanding Camera RAW format files and why they are best for photographers wanting optimal image quality and processing flexibility
Mastering Exposure
Mastering exposure requires understanding of the three principal mechanisms: shutter speed, aperture size, and the photographic material's level of sensitivity to light (ISO)
Essential Filters for Landscape Photography
Read about the essential filters for landscape photography to make your life easier and take your images to the next level
How To Photograph Winter Landscapes
How to photograph winter landscapes, gear, what you need to consider and understanding the how snow affects light
Planning A Photography Roadtrip
A guide to planning a photography roadtrip. How to find locations, what to pack and tips to get the most from your trip
Create Dramatic Landscape Photos
Luck, light, skill and perseverance are just some of the facets needed to create dramatic landscape photos