You’re on location. There’s fabulous rocks and flowers right in front of you. The setting sun paints the sky with vibrant colours. The mountian peaks are glowing. Do you capture the scene’s broad sweep? The flowers? Or do you focus on the jagged peaks reaching for the heavens? This is the landscape photographer’s dilemma. You have to choose the best angle, which means you have to choose your orientation. The best composition can mean deciding on portrait versus landscape orientation.
Understanding Landscape Orientation
Landscape orientation is like looking at a widescreen TV. Most of the time, it’s the way people think of landscape photography.
Definition and Characteristics
Landscape orientation means your photo is wider than it is tall. Think of a rectangle lying on its side. Common aspect ratios include 3:2 and 16:9. This style is classic for showing off scenery.
Strengths of Landscape Orientation
This orientation excels at capturing a wide view. You can show off a large vista and it helps establish a sense of scale, too. Leading lines, like roads or rivers, work great in this format. You can use these lines to guide the viewer’s eye. It gives them a great idea of what you’re seeing.
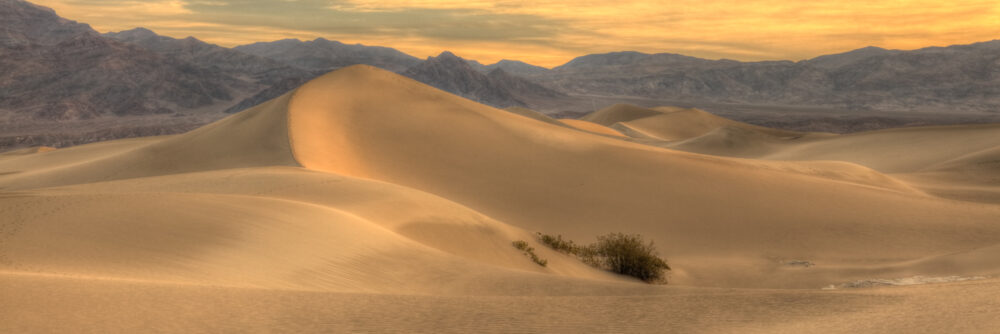
Ideal Scenarios for Landscape Orientation
Think of vast mountain ranges at sunset. A wide format is perfect. Panoramic views also shine in landscape orientation. Look at Ansel Adams’ photos of Yosemite. They are prime examples of landscape done right.
Exploring Portrait Orientation in Landscape Photography
Portrait orientation is when your photo is taller than it is wide.
Definition and Characteristics
This means the height is greater than the width. The aspect ratio may be 2:3 or 4:5. It can create a dramatic effect.
Strengths of Portrait Orientation
Portrait orientation emphasizes height. It’s great for showing tall things. It can create depth in an image. Isolating a single subject becomes easier, too. You can really make that subject stand out.
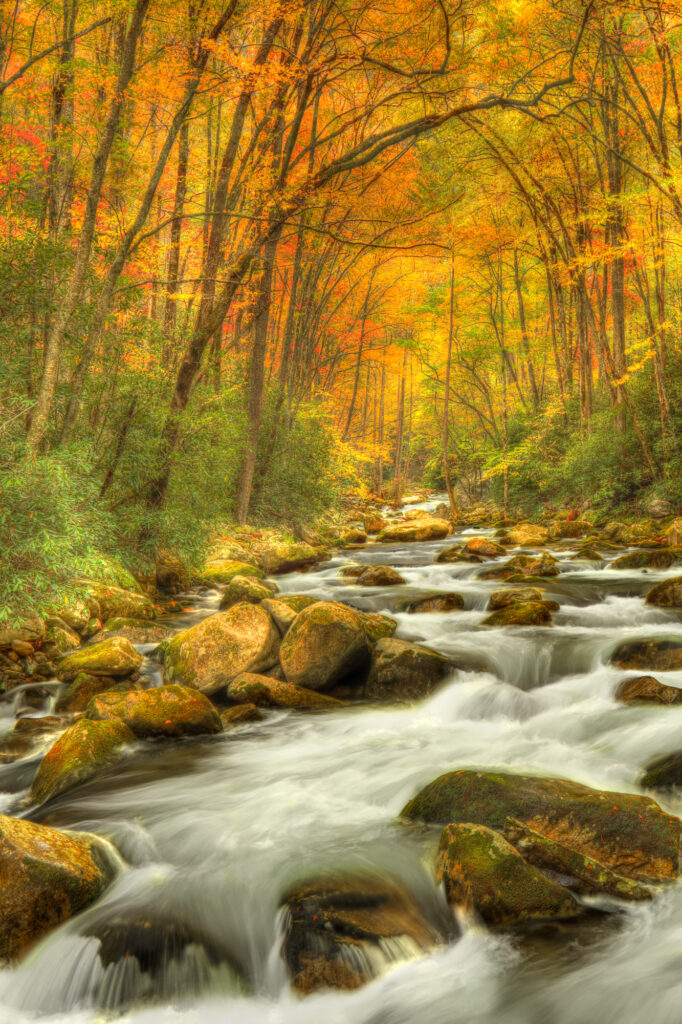
Ideal Scenarios for Portrait Orientation
Tall waterfalls look stunning in portrait and trees reaching for the sky work well too. Use portrait to emphasize interesting foreground elements. Think of a single flower with mountains in the background.
Composition Techniques for Each Orientation
How you arrange elements matters a lot. Each orientation has tricks that can help. Let’s look at what makes it so good.

Landscape Orientation Composition
Use the rule of thirds. Place key elements off-center. Use leading lines to draw the eye into the scene. Create depth by including things in the foreground, middle ground, and background. Negative space can add balance.
Portrait Orientation Composition
Again, use the rule of thirds. Emphasize vertical lines to enhance the height. Use foreground elements to create depth. Negative space can isolate your subject.
Adapting Techniques
The rule of thirds works in both formats. Leading lines can be vertical or horizontal. Focus on what you want to emphasize. Adjust your composition to fit the orientation.
Practical Tips for Choosing the Right Orientation
Choosing the correct orientation is not easy. Here’s what you should do. Make sure to consider all of the best options.
Assessing the Scene
Analyze the scene before you.
- What are the dominant lines?
- What do you want to emphasize?
- What mood do you want to create?
Answering these questions will guide your decision.
Experimentation is Key
Try both landscape and portrait. Compare the results. See which one better captures what you felt. Learn from each experiment and understand when to use each on to maximise the interest in your photos.
Considering Your Audience
Where will the photo be used? Prints often look great in landscape. Social media like Pinterest or X is friendly for portrait-oriented mobile viewing. Websites can use both, but think about layout.
Breaking the Rules and Finding Your Style
Guidelines are not rules, remember that. Experiment and see what happens.
The Power of Perspective
Different orientations change how viewers see things. Landscape gives a sense of space. Portrait can make things feel grander. It’s all about what you want to communicate.

Developing a Unique Style
Find your voice. Play with different orientations and techniques. See what resonates with you. Create images that are uniquely yours.
Conclusion
Landscape orientation is good for wide views. Portrait orientation is good for tall subjects. The “best” orientation depends on you. It depends on the scene. Most importantly, when it comes down to landscape versus portrait orientation it really depends on the story you want to tell.
Experiment, explore, and find your style. Now, go out and shoot.
A Selection Of Guide Articles
Using Reflections In Landscape Photography
We look at how to best use reflections in landscape photography as the method to add symmetry to you compositions
Adapting A Vehicle For Landscape Photography
We talk about the thought process and steps we took to make life easier when adapting a vehicle for landscape photography
RAW Format Photography
Understanding Camera RAW format files and why they are best for photographers wanting optimal image quality and processing flexibility
Mastering Exposure
Mastering exposure requires understanding of the three principal mechanisms: shutter speed, aperture size, and the photographic material's level of sensitivity to light (ISO)
Essential Filters for Landscape Photography
Read about the essential filters for landscape photography to make your life easier and take your images to the next level
How To Photograph Winter Landscapes
How to photograph winter landscapes, gear, what you need to consider and understanding the how snow affects light
Planning A Photography Roadtrip
A guide to planning a photography roadtrip. How to find locations, what to pack and tips to get the most from your trip
Create Dramatic Landscape Photos
Luck, light, skill and perseverance are just some of the facets needed to create dramatic landscape photos