Capturing the Underground
Imagine dropping into a silent, alien world beneath New Mexico’s desert. Carlsbad Caverns National Park offers a sight like no other. Its vast, dark chambers hold a mystery and beauty begging to be photographed. Yet, capturing this grandeur in such dim light brings a real challenge.
Carlsbad Caverns is a natural wonder, carved over millions of years. It features huge rooms, a wide array of delicate speleothem formations and a sense of endless depth. I was still travelling with FacelessBrotherInLaw and this hole in the ground was our next stop.
Not All To Plan
After leaving Big Bend National Park we’d driven past the Blue Origin Launch Site One. That’s Bezos’ vanity space project. The one where they badly faked the women in space. Next stop was at Guadeloupe Mountains National Park. As we were driving right past, why not? With temperatures soaring we dropped the tailgate and sat staring at the breathtaking view whilst we feasted on some very tasty sandwiches put together by FacelessBrotherInLaw. Having checked with the local Rangers we were left with a dilemma. If we stayed and hiked the trail we were interested in that would burn a coupe of hours or three. We’d then be getting to Carlsbad early evening with nowhere yet to stay. Also, FacelessBrotherInLaw had developed a puncture. Well, not exactly him, but his camping mattress. So we would need to fix that before he could use it again if he wanted to be comfortable!
Decisions, Decisions
We discussed options and decided that figuring out the sleeping arrangements should take priority. A few phone calls later and we had a hotel room sorted out where FacelessBrotherInLaw could use the bath to find the air mattress leak and patch it. So the Guadaloupe Mountains National Park stop turned out to be a lunch break. But what a lunch break with a view that was!
Plans Change
With an impromptu hotel stop now on the cards we headed there to check in which was done quickly. Obviously this is not the height of season. Another quick review of the plans was in order. We’d thought about a few hours at Carlsbad Caverns, then a saunter over to White Sands National Park the next day. But now having a few hours to kill we decided to head to the caverns early so we could get a feel for the location. This would also allow me to see what I could take in and also what I would need to take in.
Geography And Geology
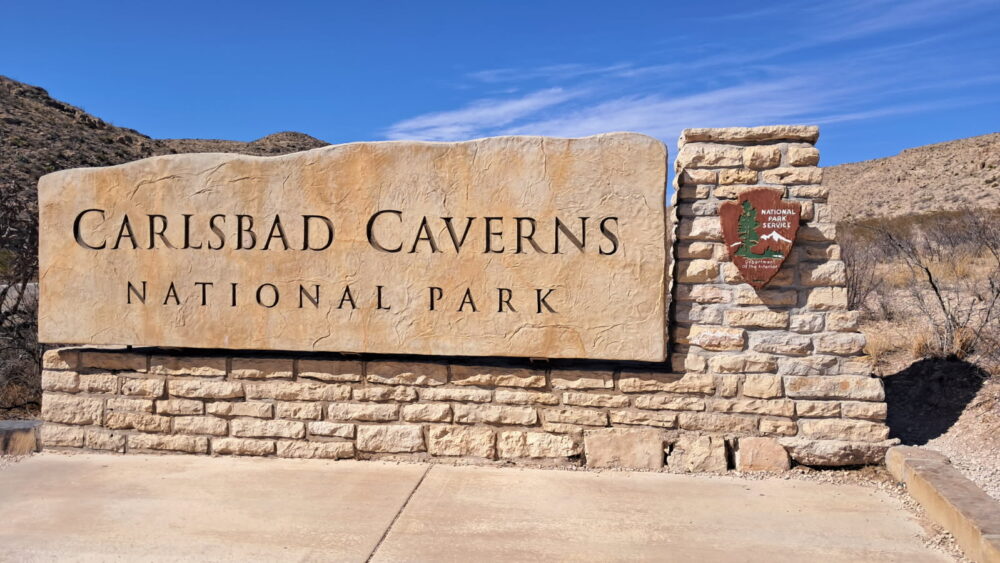
Carlsbad Caverns National Park is set within the Guadaloupe Mountains in New Mexico, approximately 18 miles south west of the town on Carlsbad. Geologically, the mountains comprise of an ancient limestone reef which was later covered by sediment and evaporites. Below the limestone petroleum exists (as part of the Mid-Continent Oil Field). As groundwater levels fluctuated, hydrogen sulfide from the petroleum mixed with the water to form sulfuric acid. When groundwater levels rose sufficiently, limestone deposits were dissolved to form the caverns. Natural erosion at the surface allowed air to enter the caverns. As rainwater or snow melt percolate through the rock and enter the cavern they absorb carbon dioxide which then evaporates or precipitates leaving behind small calcium carbonate deposits. These build over time to form the various types of speleotherm – stalagmites, stalactites, soda straws columns, etc.
Walk Or Elevator
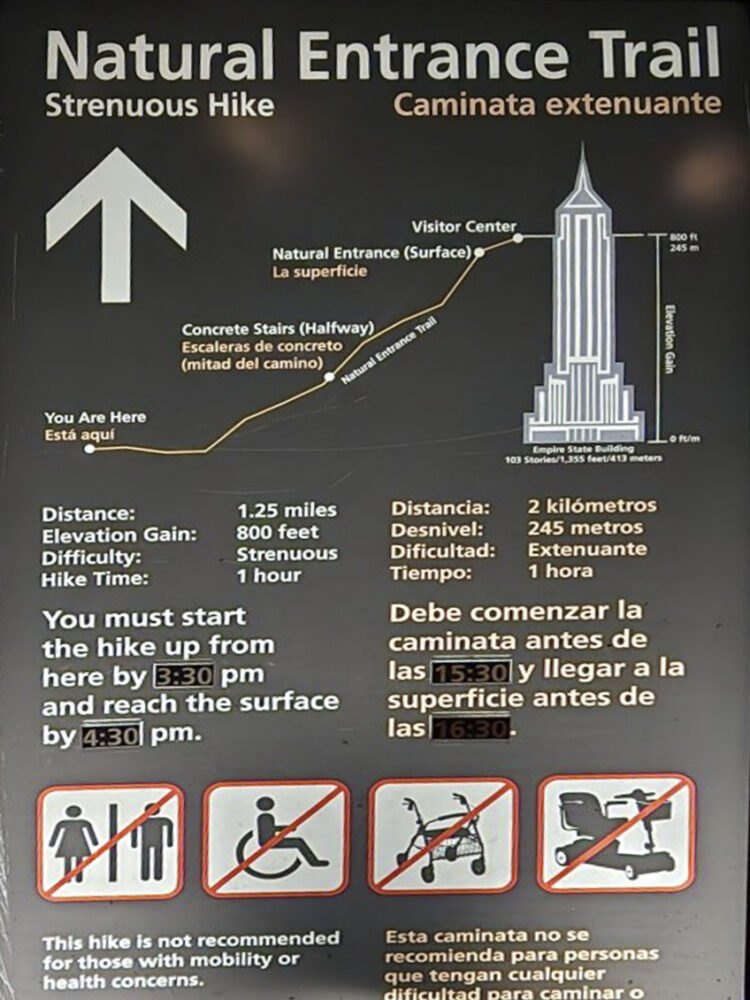
When we arrived at Carlsbad Caverns we were met with a queue for tickets. It was around 2pm and take note – the last tickets are sold at 2.15pm. Not knowing when we would arrive meant nothing was pre-booked. However, MrsFaceless and I do have a National Parks Annual Pass. Lo and behold we sauntered up to a free window for pass holders and immediately got our tickets to go underground. We had a choice – take a brief safety chat and an elevator, or walk outside for the safety chat and follow the winding path into the abyss. It seemed like a no brainer. The plan was to see the caverns, so walking down into the abyss it was!
Open Wide
The mouth of the cavern system is quite large. As you descend the sloped path there is an aura. No, not an aura. That’s definitely a smell. OMG that’s a smell. Bat guano, ripening in the sun to be precise. Although not present at this time of the year, the entrance allows for a huge bat colony to reside there for parts of the year. There are evening shows (pre booked tickets required) just to watch them fly in and out and around people’s heads. But for us, the experience was the smell. And it was ripe. Wow. Did I mention the smell?

Winding Down
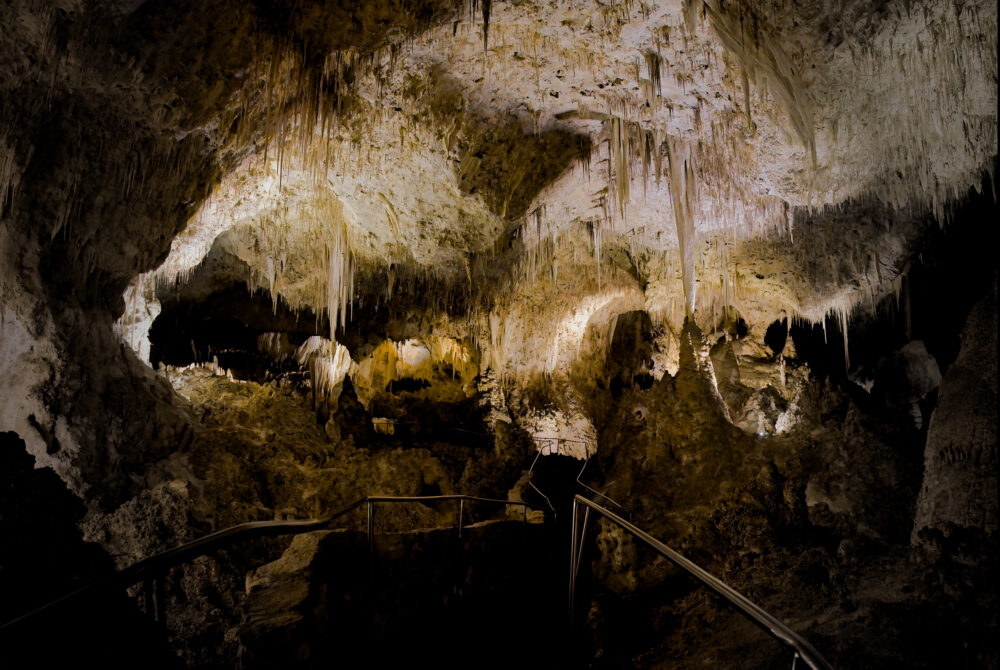
The path is very easy to navigate for all but the most unfit and infirm of individuals. We were barely into the darkness before we were wowed by the structures before us. As we lingered to take photos people were heading back up. They implored us to make it to the Big Room and that what we were already enthralled with was nothing compared to what was down below.
Time Marches On
It probably took us about 35 minutes to descend on foot to the depths. At the bottom was a sign suggesting those wanting to walk out should start to exit around 3.30pm. What with the brief safety chat and a quick wander around up top before our descent, the clock was now showing about 3.15pm. I can understand the need to allow time to walk out. We were currently a little over 800 feet underground. That’s quite some hike back out!
Essential Camera Settings for Carlsbad Caverns
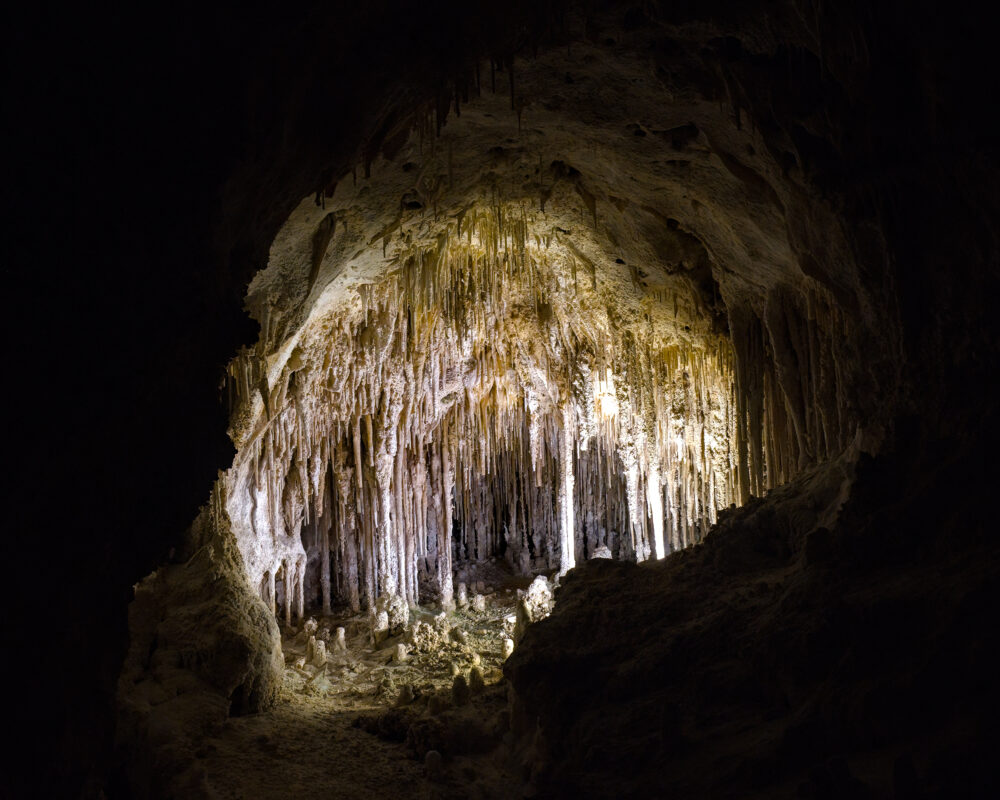
Photographing in the dark is tough at the best of times. At Carlsbad Caverns you can expect to find shots of stunning stalactites, immense open spaces and strange, beautiful rock patterns. But you are deep underground, with minimal artificial light and no flash or tripods allowed. The low light and constant darkness make it even harder to get clear shots. Understanding your camera’s settings is key to bringing out the cavern’s hidden details.
Understanding Low-Light Photography
Dim environments test even the best photographers. You need to gather as much light as possible to properly expose your photos. This often means adjusting settings you might not use often in bright sunlight. Getting it right helps avoid blurry or grainy images.
ISO Sensitivity: Balancing Noise and Brightness
ISO controls how sensitive your camera’s sensor is to light. A higher ISO brightens your image but can also add digital “noise” or grain. For Carlsbad Caverns, start with an ISO around 800 to 1600. You might go higher, up to 3200, but watch out for too much noise. Test different ISOs to find the best balance for your camera.
Aperture: Controlling Depth of Field in the Dark
https://www.thefacelessphotographers.com/landscape-photography-focus-how-to-get-sharp-photos/Your lens’s aperture affects how much light enters the camera and how much of your photo is in focus. A wide aperture (small f-number like f/2.8 or f/4) lets in more light. This is great for dark caves. It also creates a shallow depth of field, making your subject sharp while the background blurs. For wide cavern shots, a slightly smaller aperture (f/5.6 or f/8) keeps more of the scene in focus.
Shutter Speed: Freezing Motion vs. Capturing Light
Shutter speed dictates how long your camera’s sensor is exposed to light. In a dark place like Carlsbad Caverns, you will likely use slower shutter speeds. These can range from 1/30th of a second to several seconds long. Slow speeds let in more light but can cause blur if anything moves. A camera with in body image stabilization will help immensely. As will a tripod if allowed (look for photographer only days). Else, technique and cheats, like using the handrail for support is a must for sharp images at these speeds. For quick shots, keep it faster; for more light, go slower.
Illuminating the Underground: Lighting Techniques for Cavern Photography
The caverns have their own light, but it is not always enough. Smart lighting techniques can transform your Carlsbad Caverns photos. Learn to use the light that’s there and add your own when allowed. I was told there are photographer only days – they are rare, but allow for more time to compose and use off camera lighting.
Working with Existing Cave Lighting
Carlsbad Caverns has pathways lit and key formations highlighted with spotlights. Use these existing lights to your advantage. Look for how the light falls on formations, creating shadows and highlights. Frame your shots to include these natural light sources. They often add a dramatic touch to the scene.
Testing 1,2….err
My initial attempts to photograph were suffering from the almost complete lack of light. Once again I was using the Fuji X-S20. Handheld. It works really well in low light, but this was now in territory I had never photographed before. So thinking cap on! The basics were set with ISO cranked up to 6400 and aperture at F4 or close. Leading visitors around were paths, subtly lit with the minimum of light. To prevent people straying and likely falling, there were handrails. These handrails would be my surrogate tripod. The image stabilization on the Fuji is good at handheld for me at speeds of 1/60th second. I had got the shutter speed to 1/80th but needed a little more help. So I used the handrails to just steady myself that little bit more. There were parts of the handrail that the Fuji could rest on. Then it was a case of framing the shot and hoping no other visitors grabbed or leant against the handrail! That allowed me to finally start getting the images i could see in my head.
Wanderlust
The advice to make it to the bottom from other travellers was indeed excellent. It was a just a pity that FacelessBrotherInLaw and I had run out of time. This place is huge. With our initial scouting deemed a success we needed to celebrate. So we took the elevator to the surface and headed off for margaritas. Several margaritas in fact. Tomorrow we would return forewarned and forearmed, ready to explore the full subterranean cavern system.
Hotel Breakfasts
I’m not sure if it’s me but hotel breakfasts in the US seem to be rather bland, rubbery and tasteless. This morning’s fayre at the hotel was true to form. So an orange juice and a yoghurt to finish off and we’re away.
Plus Ca Change
Despite our sole intention to visit the caverns, an early morning check to see what the weather was doing threw up an interesting development. Forecast winds for the White Sands area, our intended next stop, were due to exceed 40mph. Now, that wouldn’t be fun to camp in. So we put that info on the back burner as we drove back to the caverns for our second go at the underground behemoth.
Going Down
The Park Entry ticket is valid for 7 days. Obviously with an annual pass that’s irrelevant, but it’s good to know there’s no need to queue up again. We were back at Carlsbad Caverns just after its opening time of 9.30am. This time there was no need to endure the smell. Been there. Done that. So we headed stright to the elevators and were first in line for the safety chat and subsequent plunge into the abyss.
Reflectors and Diffusers: Shaping the Light
Something I had not considered is that even simple tools like reflectors can help. A small reflector can bounce existing light onto dark areas of a formation. These tools are easy to carry, are almost certainly allowed (they’re not introducing new light) and can greatly improve your photos. They help you sculpt the light that is already present. That’s certainly something to consider for future low light situations.
Beyond the Stalactites: Composing Your Cavern Shots
Carlsbad Caverns is more than just big rocks and columns inside a big hole in the ground. Think about how you frame your shots to tell a story. Good composition makes your photos stand out. It helps viewers feel like they are right there with you.

Leading Lines and Leading Elements
Look for natural lines in the caverns that draw your eye. Pathways, the edges of formations, or even water streaks can act as leading lines. There are countless lines available in the natural and man-made structures to guide the viewer’s gaze deeper into your image. They create a sense of depth and mystery. Use them to make your photos more dynamic.
The Human Element
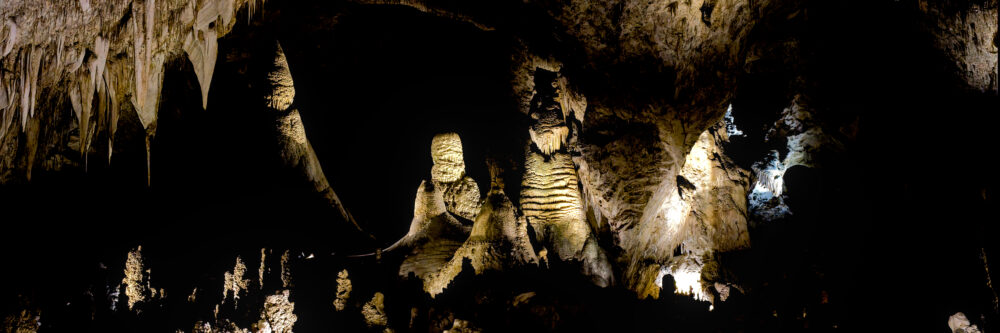
The Carlsbad Caverns are huge, but it is really hard to show that in a photo. I am normally not one for including a person in your shot, but in this case they both provide a sense of scale and, due to the low light, it is entirely feasible to photograph them as a silhouette or at least make them unrecognizable. A small figure walking along a path or looking up at a vast dome makes the cave seem immense. This trick truly shows the size of these underground wonders. Make sure to respect other visitors and the park’s guidance on where to stand. I generally found that whenever I stood in a quiet space and composed my shot, other visitors would quickly gather round. Often they would be wondering what I was looking at as I stealthily pointed the Fuji at my chosen, mineral deposit subject.
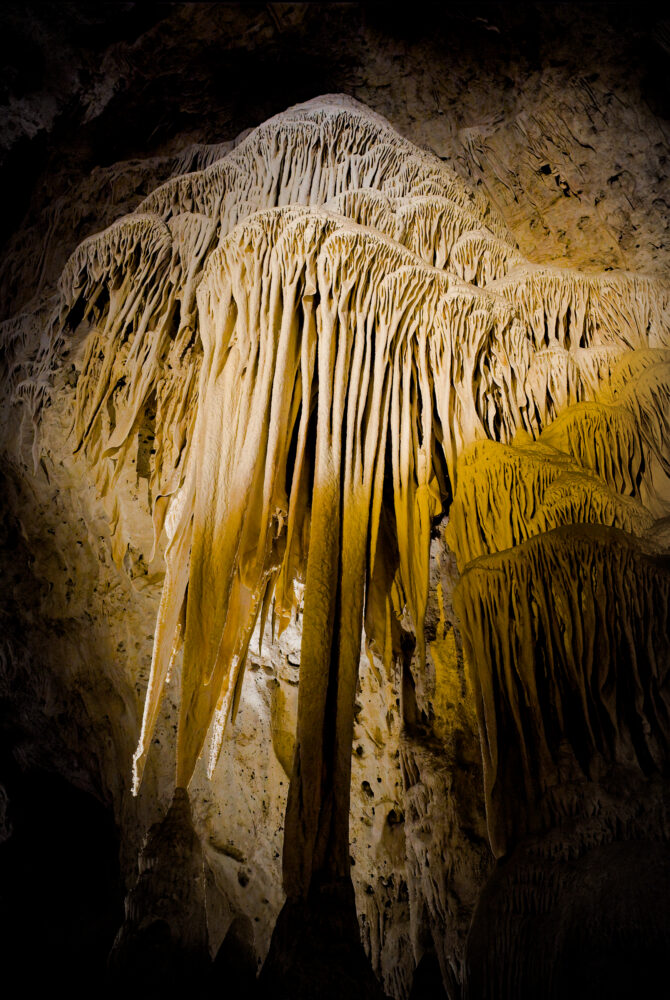
Focusing on Texture and Detail
Carlsbad Caverns is full of amazing textures. Look closely at the speleothems – the stalactites, stalagmites, and flowstones. Many have intricate patterns, sparkling crystals, or smooth, wavy surfaces. It’s possible to isolate these details with a tighter shot. That does require a steady hand. There is a unique beauty in each formation.
Wide-Angle vs. Telephoto
Your lens choice impacts your photo’s story. A wide-angle lens (like 16mm-35mm) is great for showing the sheer size of the cavern rooms. It captures the vastness and multiple formations at once. A telephoto lens (like 70mm-200mm) helps you zoom in on specific details. Use it to highlight a single stalactite or a distant, interesting rock. Carry both if you can, or know how to shoot and stitch hand held panormamas. I was using a 16-80mm, or 24-120mm equivalent allowing for crop factor. I found that to be pretty much ideal.
Navigating the Caverns: Practical Tips for Photographers
A successful photography trip to Carlsbad Caverns means more than just good camera skills. Prepare well and follow park rules. This ensures a safe and rewarding experience for everyone.
Respecting the Environment: Leave No Trace Principles
The caverns are a fragile ecosystem. Always follow Leave No Trace principles. Do not touch any formations, as the oils from your skin can stop their growth. Stay on marked paths and never leave trash behind. Protect this natural treasure for future visitors. I don;t want to preach but your actions matter in preserving this special place. I’ve seen too many people ignoring the simplest rules. It would be a travesty if places like this are shut down because of a few reckless individuals. But i can see it happening. For anyone interested, read about the off road community’s struggles in Utah and beyond and how tracks used for generations are being shut down with little to no recourse.
Best Times to Visit for Photography
Carlsbad Caverns has a steady temperature year-round, so the weather above ground does not matter as much. However, crowd levels can affect your photo chances. Early mornings or late afternoons often have fewer people. Weekdays are generally quieter than weekends. Less crowded times mean more space and time to perfect your compositions or retake if there is an issue with the image.
What to Pack: Essential Gear Beyond Your Camera
Beyond your camera and lenses, bring extra batteries. Colder environments drain batteries faster. Whilst not cold in the cavern it is colder, so that also means dress in layers. Plus, it’s an awful long way back to the car! A micro-fiber cleaning cloth is useful for any moisture on your lens. Wear comfortable, non-slip shoes for walking on wet paths. A small backpack may be allowed – please check. During our visit there were explicitly no snacks allowed and the only drink allowed was plain water.
Post-Processing Power: Enhancing Your Cavern Images
The magic does not stop when you leave the cave. Post-processing can bring out the hidden beauty in your Carlsbad Caverns photos. Even small tweaks can make a big difference.
Adjusting Exposure and Contrast for Depth
Cavern photos often come out a bit flat due to the low light. Use editing software to boost exposure and contrast. Recover details in the shadows without blowing out the highlights. This adds depth to your images. It makes the caverns appear truer to their vast and inviting nature.
Color Correction and White Balance in Low Light
Artificial lights in the caverns can sometimes give your photos an orange or green tint. Adjust the white balance to correct these colour casts. Aim for natural-looking tones. Play with the colour saturation to make the unique hues of the rock pop. This brings out the true colors of the formations.
Sharpening and Noise Reduction Techniques
With higher ISOs, you might see some noise in your images. Use noise reduction tools in your editing software. Be careful not to overdo it, or your photos can look too smooth and unnatural. Apply a subtle amount of sharpening to bring back fine details. This helps your formations look crisp.
Cropping for Impact
Sometimes, a simple crop can greatly improve a photo. Remove distracting elements from the edges of your frame. Crop to emphasize your subject or to create a stronger composition. A good crop can draw the viewer’s eye exactly where you want it. This makes your images more powerful.
More Than Just Below Ground
After spending a good number of hours underground there was a distinct uptick in people. FacelessBrotherInLaw and I were pretty much done photographing so we returned to the surface. Here we took in the obligatory visit to the gift shop followed by a walk around outside. There are a number of picnic tables set up with quite a view looking south east from the Guadaloupe Mountain range. It made for a lovely, picturesque spot for a late lunch.
Doodads
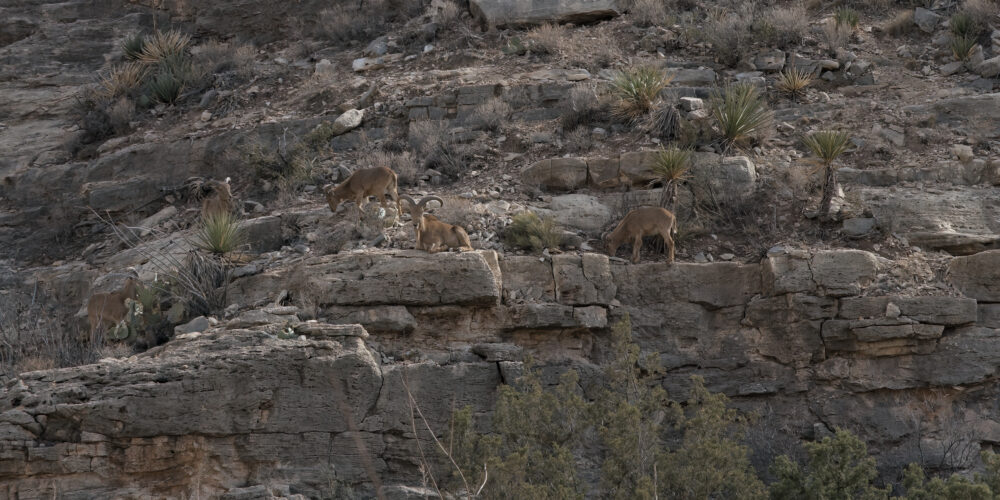
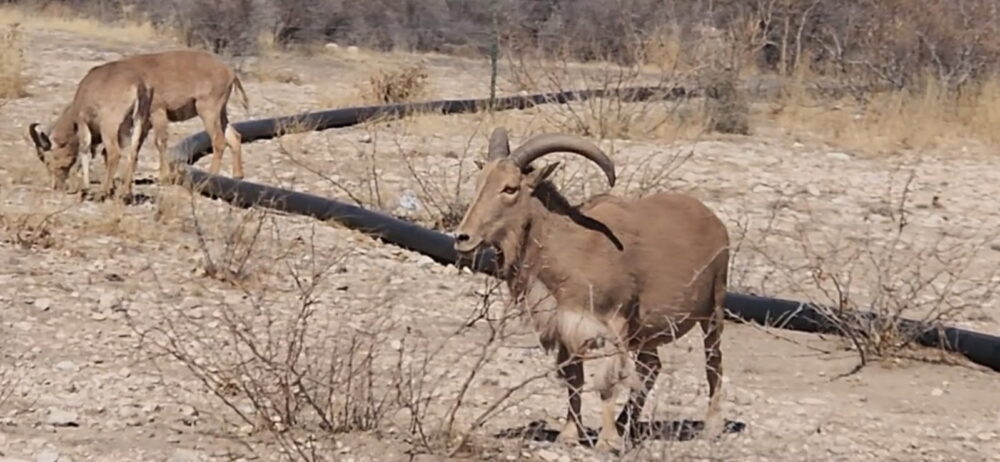
The time had come for more margaritas us to head back to Carlsbad and make plans for the next leg of our trip. The majority of the park is actually a protected wilderness area. As we drove out FacelessBrotherInLaw shouted, “doodads”. Or, atleast that’s what I heard. It actually was a herd of Aoudads, a name taken from the Berber language. The are more commonly known as Barbary Sheep and a native of the mountains North and West Africa. Yet here they were in North America. Quite a lot of them, at that! They seemed mostly unbothered by the cars going past. We took a few minutes to get some nice shots before the crowd that quickly assembled on the approach road encroached too far and, as if by magic, they were gone.
Conclusion
Photographing Carlsbad Caverns National Park is a unique and rewarding adventure. Remember to prepare your gear and understand your camera’s settings for low light. Respect the fragile cave environment and its rules. Use creative composition to highlight the scale, texture, and beauty of the formations. With smart post-processing, your images will truly shine.
So pack your camera, check your settings, and prepare to capture the underground majesty. Carlsbad Caverns National Park awaits your lens. What stories will your photos tell?
We hope you have enjoyed our little journey together – the story and the video; if so please head over and leave a comment on youtube – and a like and subscribe is always much appreciated!
Until next time…..
More National Park Posts
