If you’ve ever wondered how to photograph in a dark cave, then read on! Hopefully this is a question you;ve asked yourself before you find yourself standing there in the dark. Any time you want to photograph in a dark cave you are presented with a unique challenges and opportunities for creativity, making it an intriguing endeavour for photographers. The low-light environment requires specialized techniques, the right equipment and an understanding of the cave’s features to capture stunning images. From managing the lack of natural light to utilizing artificial sources effectively, navigating the complexities of cave photography can lead to breathtaking results. This article will guide you through essential strategies, tips and safety considerations to enhance your cave photography experience.
Understanding Cave Lighting Conditions
The Challenges of Low Light
Photographing in a cave is sometimes like trying to find a light switch in a black hole. It’s dark, and you’re probably going to bump into things. The main challenge here is the sheer lack of light. Your camera’s sensor will struggle to gather enough illumination, leading to grainy images that look more like an abstract painting of a cave than the actual cave itself. So, brace yourself for a fight against shadows and prepare to get creative!
Natural vs. Artificial Light Sources
Caves can be a treasure trove of natural light, thanks to those mysterious glowing minerals (if you’re lucky). However, most caves will have you relying on artificial light sources like flashlights, headlamps or for the more tourist centric ones, a few path lights or spotlights highlighting special features. Just remember, while natural light creates soft and enchanting shadows, artificial sources can produce harsh contrasts.
Essential Camera Equipment for Cave Photography
Choosing the Right Camera
When it comes to cave photography, you want a camera that’s as tough as the rock formations around you. DSLRs and mirrorless cameras are excellent choices because of their versatility and performance in low-light situations. Make sure it’s equipped with manual settings so you can tweak your exposure like a true pro. A camera like the Fuji X-S20 I used with any form of image stabilization will help. Modern IBIS can be worth every penny of an upgrade.
Lenses Suited for Cave Environments
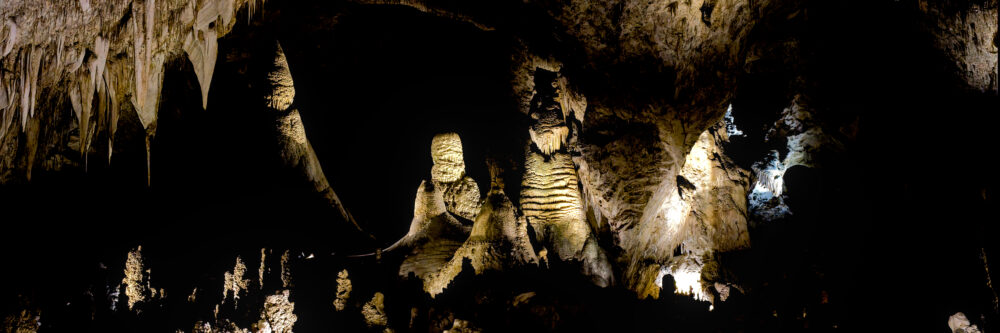
In the world of cave photography, a wide aperture is your best friend. A lens with an f-stop of 2.8 or lower will allow more light to hit the sensor. A wide-angle lens will also help you capture those sweeping stalactites and stalagmites in all their glory. If you’re worried about changing lenses as you photograph in a dark cave then try a wide angle zoom. For my trip to Carlsbad Caverns, a New Mexico National Park, I used a 16-80mm F4.
Accessories to Consider
No photographer goes into battle without their trusty tools, right? To get the best result as you photograph in a dark cave consider investing in a sturdy tripod for long exposures. Be aware that you may not be allowed to take that tripod into some caves, especially the more touristy ones. Extra batteries, because who likes a dead camera, are a must as is a cloth to wipe the lens clean when needed. Don’t forget a flashlight for illuminating your surroundings (again, if allowed) and possibly for dramatic shadow play. After all, caves are just nature’s stage waiting for your artistic flair!
Techniques for Capturing Detail in Low Light
Long Exposure Photography
Long exposure is your secret weapon in a dark cave. By keeping the shutter open for extended periods, you can let in more light. Use your tripod and set your camera to a low ISO for the best results. Capture the smooth flow of water in underground streams or the ethereal glow of reflected minerals.
Rocks And Rails
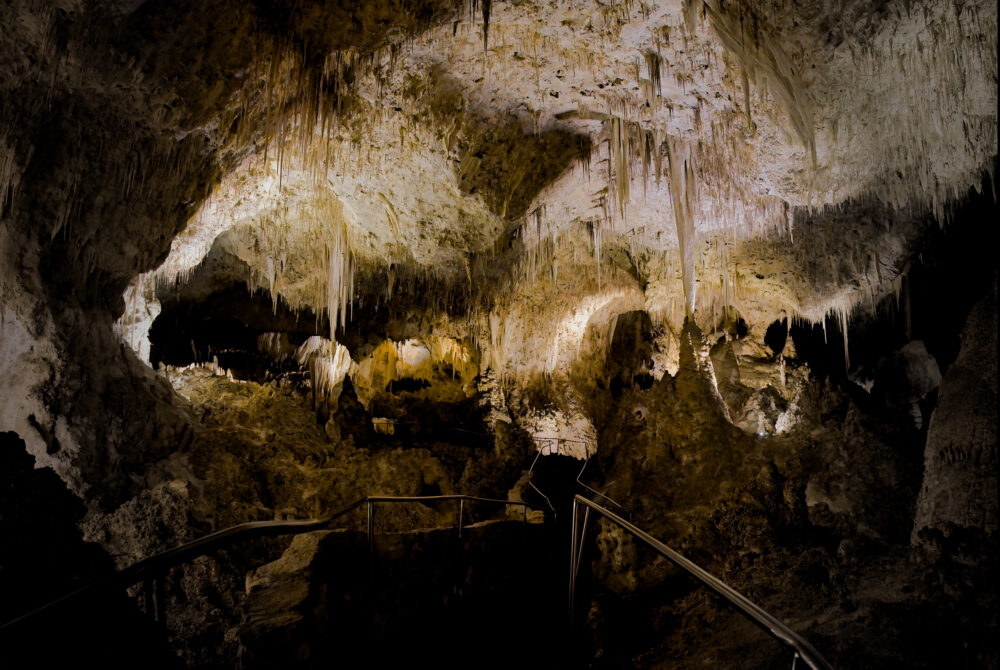
If you are trying to photograph in a dark cave without a tripod then look for things to assist you. These could be a sign, a seat or a handrail. Each can be used to rest the camera on to keep it steady for a longer exposure.
Using High ISO Settings Effectively
Where tripods are not allowed, high ISO is your friend. Practice before you go at holding your camera steady. I can generally get a usable image at around 1/60th second. Don’t be afraid to crank up that ISO! A higher ISO can help your camera pick up more light, but be warned, too high and you might end up with noise that ruins the image. Start somewhere around 1600 or 3200 and adjust from there. Experimenting is key. Play around until you find that sweet spot between brightness and clarity. After all, no one wants to come out of a cave with photos that look like they were taken through a snowstorm.
Focusing in Dark Conditions
Focusing in the dark can feel like trying to thread a needle with your eyes closed! Use your flashlight to shine on a nearby rock or object to help your camera lock focus. If you’re using manual focus, give your lens a bit of a twist until you see the magic happen. Remember, if all else fails, rely on good ol’ practice. Your eyes will eventually adjust to the dark and you might just become a focusing ninja in the process.
Importance of Tripods and Stabilization
Types of Tripods for Cave Use
Not all tripods are created equal, especially when it comes to cave exploration. Lightweight carbon fibre tripods are a great choice since they’re sturdy yet portable. A small table-top tripod is discrete enough to not attract attention. The same goes for a device I have and use occassionally, the PlatyPod.
Alternative Stabilization Methods
If you’re feeling particularly adventurous or tripods are not allowed, consider alternative methods for stabilization. You can brace your camera against a solid surface, use a bean bag for support or even fit your camera into a backpack for a makeshift stand. If you’re really in a pinch, you can always use your body. Hold the camera tight to your chest for added support. Just remember, photography should include some creative thinking, not just standing still like a statue!
Utilizing Flash and Artificial Lighting
Types of Flash Units
When it comes to illuminating the depths when you’re about to photograph in a dark cave, your choice of flash units can make all the difference. On-camera flashes can deliver a quick burst of light, but they’re often too harsh and may leave you with unflattering shadows. Off-camera flashes or external speedlights? Now we’re talking! These allow you to bounce light off the cave walls, creating a softer and more natural look. Alternatively, consider using LED panels for a continuous light source. They offer a more stable option for those longer exposures. Do check what’s allowed and not allowed in the cave. Also, be respectful of others.
Balancing Flash with Ambient Light
Achieving the perfect balance between your flash and the ambient cave light is like a delicate dance. You don’t want to stomp all over your partner’s toes! Start by setting your camera to a low ISO and a slow shutter speed to capture the ambient light. Then, use your flash to fill in dark spots without overpowering your shot.
Creative Lighting Techniques
Creative lighting can transform your cave photos from “meh” to “wow!” Try techniques like light painting where you use your flashlight to “paint” elements of the scene during a long exposure. Or, experiment with coloured gels over your flash for some dramatic effects! Don’t shy away from shadows, either. They can add depth and mystery, much like your uncle’s fish stories at family gatherings.
Composition Strategies for Cave Environments
Finding Leading Lines and Textures
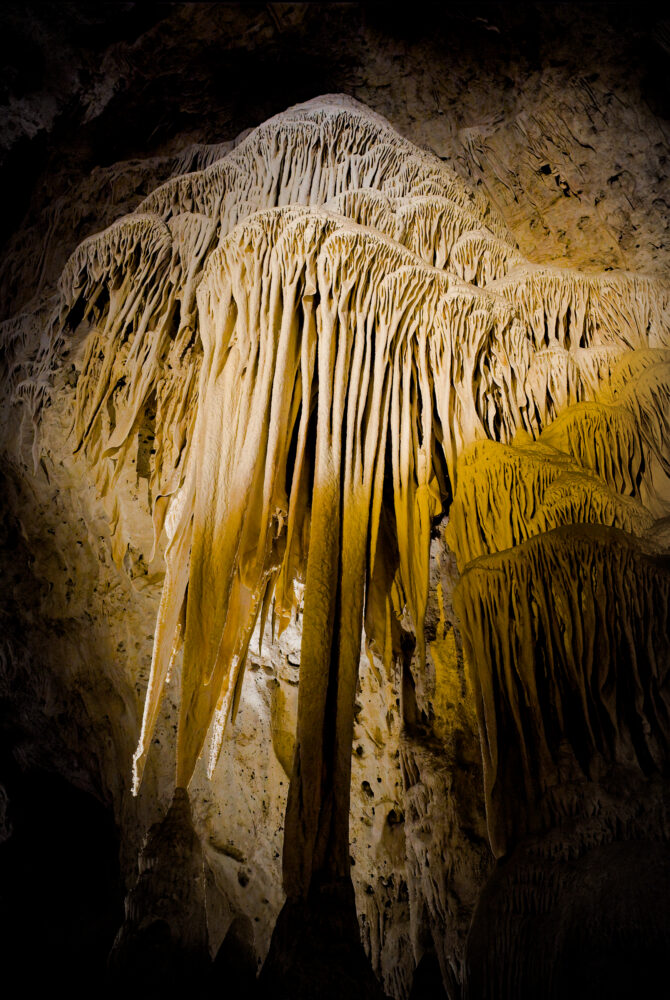
Caves are nature’s own art gallery and you are the curator. Look for leading lines. Think rock formations or water paths that guide the viewer’s eye through your image. Embrace the textures around you. Whether it’s the rugged walls or the smooth, wet surfaces, close-ups can highlight the cave’s unique characteristics. After all, who doesn’t love a good texture?
Incorporating Scale and Perspective
To avoid making your cave shots look like tiny dollhouses, play with perspective. Include elements that convey scale such as a fellow photographer or a friendly bat (preferably the non-vampire kind). Wide-angle lenses can also bring that grandiose feel to your photos by capturing more of the cave’s vastness. And remember, sometimes the best viewpoint is right from the ground, dramatically looking up at stalactites. Just don’t trip over your own feet while trying to find it!
Framing and Layering Techniques
Framing and layering can elevate your photography game to new heights. Think of them as the secret sauce! Use natural frames like rock arches or overhanging stalactites to draw the viewer’s attention into the scene. Layering elements creates depth. Consider incorporating foreground objects, like a splash of water or some pebbles, to add interest.
Post-Processing Tips for Cave Photos
Adjusting Exposure and Contrast
Even the best cave shots might need a little digital TLC. Start by adjusting your exposure and contrast in post-processing. You’ll want to ensure that your beautiful cave formations aren’t lost in the shadows or overly brightened into a glowing mess. Boost the contrast to give your images that pop! .
Enhancing Colours and Details
Caves can have stunning colours that might not always translate perfectly in your photos. Use post-processing tools to enhance subtle hues and bring those details to life! A touch of saturation can make your stalactites shine brightly, while sharpening can help reveal the textures of the rock formations. It’s all about making those cave gems sparkle!
Reducing Noise in Low Light Images
Low light photography can sometimes result in a grainy mess that screams “I took this at midnight in a cave!” Luckily, various software options can help reduce noise and smooth out those pesky artifacts. When editing, aim for a balance. Too much noise reduction can make your images look overly soft.
Above all, after processign your images should still look natural. So don’t overdo it!
Safety Considerations While Photographing in Caves
Gear Safety and Protection
Caves can be damp, dark and downright unpredictable, so protecting your gear is paramount. Invest in weather-sealed bags or cases for your camera and lenses. Trust me, your equipment will thank you later. Use lens cloths to wipe away moisture and pack extra batteries. It’s not just for cold caves, as sometimes you lose track of time and there’s nothing worse than having to walk all the way back to the car for a fresh battery! Keep everything secured to avoid mishaps while exploring; you don’t want your camera taking a tumble.

Awareness of Cave Hazards
As thrilling as cave exploration is, it’s important to be aware of potential hazards. Watch out for slippery surfaces, low ceilings and any sudden drops. Bring your trusty flashlight (or three). Always be mindful of your surroundings. Caves have their quirks and surprises, and they aren’t all as friendly as they seem (looking at you, creepy crawlies).
Best Practices for Cave Exploration
Before you venture into the unknown, familiarize yourself with cave etiquette and best practices. Stick to marked paths to avoid disturbing fragile ecosystems and be respectful to any wildlife you encounter. Bring a buddy as exploring in pairs is not just safer, but it makes for great photo ops! Lastly, have a plan. Know your exit routes and keep track of time. After all, a poorly timed exit could lead to an extended cave stay, and those bats can really throw a party!
Conclusion
In conclusion, photographing in a dark cave can be a rewarding and exhilarating experience that challenges your skills and creativity. By understanding the unique lighting conditions, utilizing the right equipment, and applying effective techniques, you can capture the beauty of these subterranean environments. Remember to prioritize safety while exploring and have fun experimenting with different compositions and lighting. With practice and patience, your cave photography can transform into stunning visual stories that showcase the wonders hidden beneath the earth’s surface.