(and those we suggest you avoid!)
If you’ve ever wondered what are the essential filters for landscape photography and why you need them, then read on! Imagine capturing a landscape where the sky glows perfectly, and the foreground pops with detail. Filters make this possible, transforming your outdoor shots in ways simple in-camera tweaks cannot. They help you tackle tough challenges like harsh sunlight, skies that are too bright, or blurring motion. Think of filters as secret weapons for truly stunning photographs.
These clever tools control light before it even hits your camera sensor. They are key to boosting image quality and achieving unique creative looks. Let’s dive into the most important filters and how they work their magic for your pictures.
Understanding Filter Types
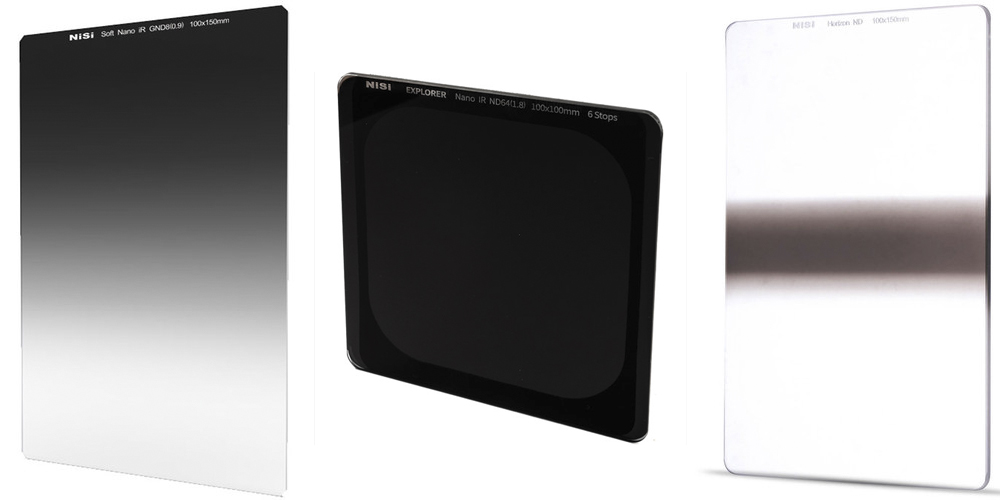
Graduated Neutral Density (GND) Filters
GND filters are vital for balancing scenes with bright skies and darker foregrounds. They have a clear bottom and a dark top, with a smooth shift in between. This helps you expose both parts of your picture correctly. Hard-edge GNDs work well for clear horizons, like at sea. Soft-edge GNDs are better for uneven horizons, such as mountains or trees.
For beginners, a medium GND filter often works best. Try a 3-stop soft or medium transition to start. You can capture amazing sunsets with bright, colourful skies and still see the details in a shadowed mountain range.
Standard Neutral Density (ND) Filters
Standard ND filters act like sunglasses for your camera lens. They cut down the total light uniformly, across the whole image. This lets you use slower shutter speeds, even in bright conditions. You can create silky smooth water in waterfalls or blur moving clouds into streaks. ND filters also let you shoot with wide-open apertures in daylight. This helps you get that lovely blurred background effect, known as bokeh.


Left : 8 second exposue – Right : ND Filter and 2 minute exposure
When you use an ND filter for long exposures, you’ll need to adjust your shutter speed. Many phone apps can help you calculate the new exposure time. Think of how Ansel Adams, a famous photographer, carefully controlled light in his images. Today’s artists use ND filters for similar artistic control, making dramatic and dreamy photos.
Polarizing Filters (CPL)
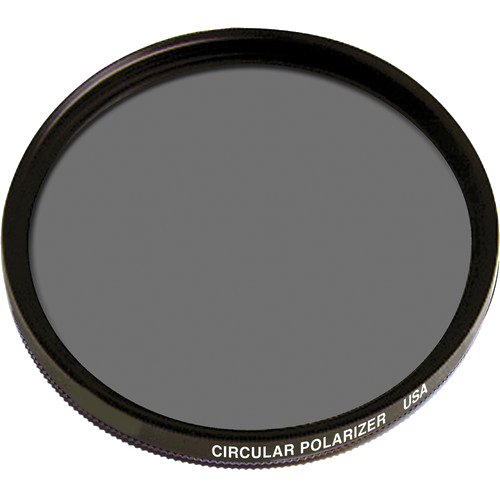
A polarizing filter, or CPL, is a must-have for vibrant landscape pictures. It dramatically reduces glare and reflections from water, glass, or leaves. It also makes blue skies deeper and richer. Your greens and other colours will appear more saturated and alive. You just rotate the front of the filter to see its effect change.
Always test your CPL filter by looking through your viewfinder while you turn it. You will see the reflections disappear or the sky deepen right before your eyes. Did you know a good CPL filter can cut reflections by up to 90%? This makes a huge difference in your photos.
Specialized Filters for Specific Scenarios
Reverse Graduated Neutral Density Filters
Reverse GND filters are unique. Their darkest part is in the middle, fading to lighter toward the top. This design is perfect for sunrises and sunsets. During these times, the brightest light is often right on the horizon line. A reverse GND helps control that intense glow.
Imagine photographing a sunrise on the coast. The sun creates an incredibly bright strip right where the ocean meets the sky. A reverse GND filter is perfect for taming that strong light without making the rest of the sky too dark.
Infrared (IR) Filters
Infrared photography offers a truly otherworldly look. IR filters block all visible light, allowing only infrared light to reach your sensor. This creates stunning, often dreamlike landscapes. Green foliage turns bright white, skies become dark and dramatic, and water can look eerie.
Getting the most from IR photography often requires special editing. You’ll need to adjust colours and contrast in your photo software. It’s a fun way to explore a completely different kind of landscape art.
Colour Filters
In the past, photographers often used colour filters for black and white film. Filters like red or yellow could make skies darker or enhance cloud contrast. For digital cameras, you can achieve similar effects through post-processing. Still, some artists enjoy using physical colour filters for unique creative control. They offer a hands-on way to influence tone right in the camera.
Filter Material and Quality
Glass vs. Resin Filters
When buying filters, you’ll find two main materials: glass and resin. Optical glass filters offer the best clarity and are very scratch-resistant. They give you the sharpest images possible. Resin filters are more affordable and less likely to shatter if dropped. However, they can scratch more easily and sometimes have a slight colour cast.
If you’re serious about your landscape photos, it’s wise to invest in high-quality glass filters. They will last longer and give you better image results.
Multi-Coated Filters
High-quality filters often have multiple layers of coating. These multi-coatings are super important. They reduce lens flare and ghosting, which can ruin a photo. They also allow more light to pass through the filter, keeping your images bright and clear. Leading brands like B+W, Lee Filters, and Hoya are known for their excellent coatings. They put a lot of focus on optical performance.
Practical Considerations for Using Filters
Filter Mounting Systems
You can use three main types of filter mounting systems. Screw-on filters twist directly onto your lens. They are easy to use and generally affordable. The square filter system uses a holder that attaches to your lens, into which you slide square or rectangular filters. This system is more versatile, allowing you to combine several filters at once. However, it can take a bit more time to set up. Finally, the new kid on the block, magnetic filters which are just that, magnetic.
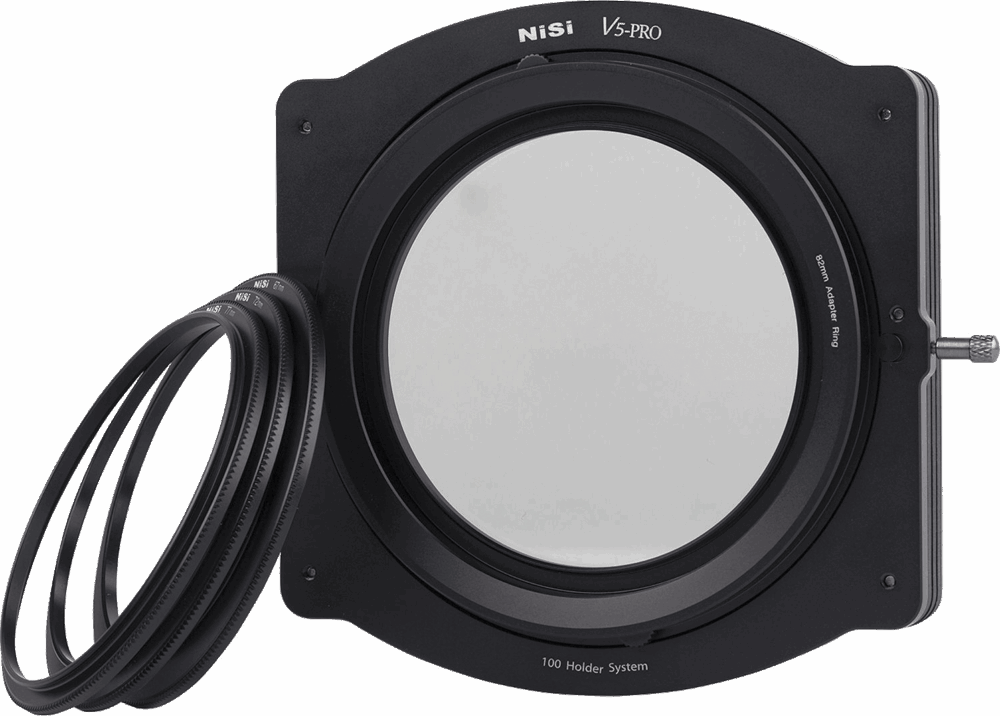
If you plan to use multiple filters, especially GNDs, a good quality square filter holder is a smart purchase. It offers flexibility you won’t get with screw-on options. Always take into account the diameter of your largest lens and we suggest buying for that size (or larger if you intend to stack which should help to avoind vignetting). Therefore yo may need step up rings for your smaller lenses.
Stacking Filters
Combining filters, like an ND and a GND, can unlock incredible creative possibilities. You might stack them to get both a long exposure and a balanced sky. Just be aware of potential drawbacks. Stacking too many filters can sometimes cause vignetting, where the corners of your photo look dark. It can also increase the chance of lens flare.
Always check for vignetting, especially when shooting with wide-angle lenses and stacking filters. It’s better to notice it in the field than after you get home.
Choosing the Right Strength
Selecting the correct filter strength depends on the effect you want and the light. For a very long exposure to blur a powerful waterfall, you might need a 10-stop ND filter. This dramatically slows down your shutter speed. For a balanced landscape with a slightly brighter sky, a 2 or 3-stop GND filter might be perfect. You learn what strengths work best by trying them out in different lighting conditions.
Ones To Avoid
Whilst it may seem a great idea to buy a single, variable ND filter, many of these suffer from issues like banding and differential darkening. Again, been there. Done that. We would suggest avoiding these.
Ones We haven’t Talked About
There are several other types of filter that you may also want to experiment with. They may not be essential filters for landscape photography, but they do help to achieve a specific look in specific circumstances. Like a dehaze/UV filter, star filters or maybe a Blackmist filter for a specific cinematic look. A lot of similar effects can be recreated in post processing now, but with most photography, getting it right in-camera first is the goal of many photographers.
Can I Get Away Without Filters
Simple answer, maybe. There are times when a filter is a must, like a CPL for reducing glare. It’s not so easy to compose around that and equally problematic to remove in post processing. An ND filter can be worked around in some situations. For example, to give a similar effect and slow water down you could take multiple photos and then stack in your software of choice, whilst adjusting opacity or using a ‘screen’ function to show lighter areas from the different layers. It works, but is it as good? Hmmm…sometimes. But it requires more work in the field and more work post processing. That’s the kind of cheat code you use when you’ve hiked several miles then realise you’ve left your ND filters back in the car.
Conclusion
Filters are powerful tools for landscape photographers. They let you control light in ways your camera alone cannot. Graduated Neutral Density filters balance bright skies, while Standard ND filters help when creating dreamy long exposures. Polarizing filters reduce glare and make colours pop. Experimenting with these essential filters will greatly expand your creative options. They help you achieve the artistic vision you have for your landscape shots.
A Selection Of Guide Articles
Using Reflections In Landscape Photography
We look at how to best use reflections in landscape photography as the method to add symmetry to you compositions
Adapting A Vehicle For Landscape Photography
We talk about the thought process and steps we took to make life easier when adapting a vehicle for landscape photography
RAW Format Photography
Understanding Camera RAW format files and why they are best for photographers wanting optimal image quality and processing flexibility
Mastering Exposure
Mastering exposure requires understanding of the three principal mechanisms: shutter speed, aperture size, and the photographic material's level of sensitivity to light (ISO)
Essential Filters for Landscape Photography
Read about the essential filters for landscape photography to make your life easier and take your images to the next level
How To Photograph Winter Landscapes
How to photograph winter landscapes, gear, what you need to consider and understanding the how snow affects light
Planning A Photography Roadtrip
A guide to planning a photography roadtrip. How to find locations, what to pack and tips to get the most from your trip
Create Dramatic Landscape Photos
Luck, light, skill and perseverance are just some of the facets needed to create dramatic landscape photos