
Ever snapped a photo with a fantastic sky only to find your subject is way too dark? Or maybe the opposite occurs, with your subject looking great, but the sky is washed out and overexposed. This is where understanding digital camera metering modes comes in. Metering is essential in digital photography. It dictates how your camera assesses light. Your digital camera likely offers various metering modes and understanding it greatly impacts the exposure and overall quality of your images.
What is Metering and Why Does It Matter?
Your camera uses a light meter to judge a scene’s brightness. This meter strives for a specific exposure. It aims for what’s called “18% grey“. Think of it as a middle ground. Your camera wants to turn everything into this shade of grey. Mastering metering avoids photos that are either too bright or too dark.
How Your Camera Sees Light
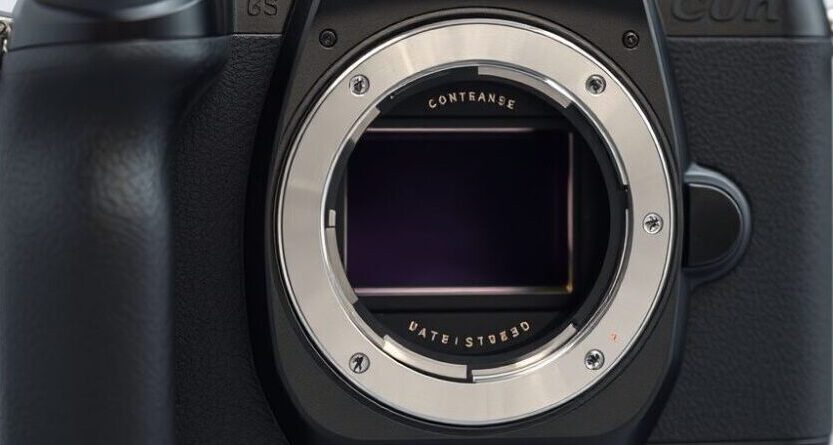
Your camera’s sensor measures light. It determines the intensity of light hitting it. Sensors translate that light into electrical signals. The camera then interprets these signals as brightness values. Too much light and the image might be overexposed. Not enough light and underexposure results. The camera’s meter helps it make the right call.
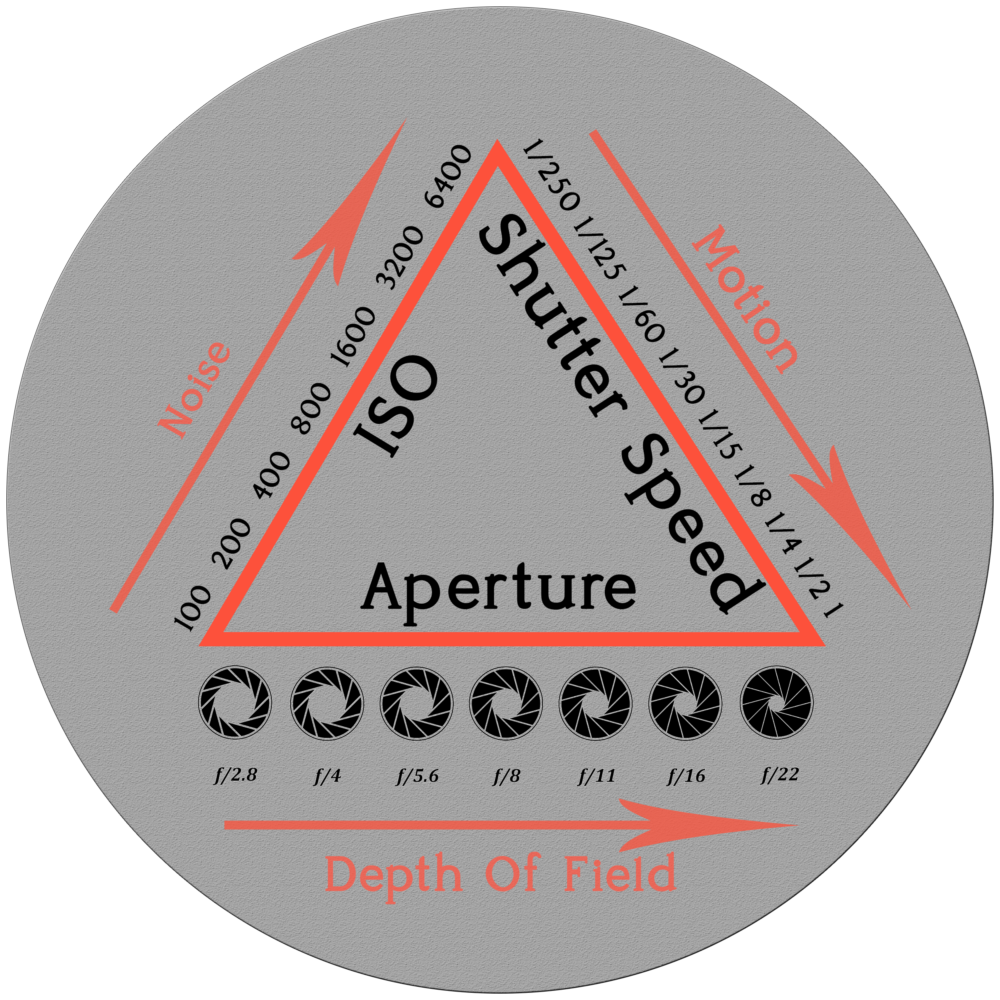
The Exposure Triangle and Metering
Aperture, shutter speed, and ISO all affect your exposure. They also work together with the metering system. Aperture controls the amount of light entering the lens. Shutter speed dictates how long the sensor is exposed to light. ISO determines the sensor’s sensitivity to light. Metering suggests the right combination of these settings. This ensures a well-exposed photograph.
Common Metering Problems and Their Solutions
Backlit subjects often confuse camera meters. They also struggle with high-contrast scenes. For instance, a bright sky behind an object tends to result in an underexposed subject. Or, a snowy scene can look dull because the meter darkens it. But understanding metering modes helps you compensate. Adjusting exposure or using spot metering helps a lot.
Metering Modes

Evaluating Evaluative Metering (Also Called Matrix or Multi-Zone)
Evaluative metering, also known as matrix or multi-zone metering, is the default on many cameras. It analyzes the entire scene using multiple zones. It takes all parts of your image into account. This is a good option for many everyday situations.
How Evaluative Metering Works
This metering mode divides the scene into zones. The camera then analyzes each zone for brightness. It uses an algorithm to determine the best exposure. It identifies the primary subject in the scene. The algorithm considers factors like focus and contrast. It then adjusts the exposure for what it believes is the optimal result.
When to Use Evaluative Metering
Use evaluative metering for landscapes. Also consider it for general scenes with balanced lighting. It excels in scenarios where light is evenly distributed. It can handle a variety of shooting conditions without needing constant adjustments.
When to Avoid Evaluative Metering
Avoid evaluative metering with backlit subjects. Scenes with large areas of bright or dark tones present problems too. In these situations, the camera may get confused by the extreme differences in brightness. The final image may not expose the main subject correctly.
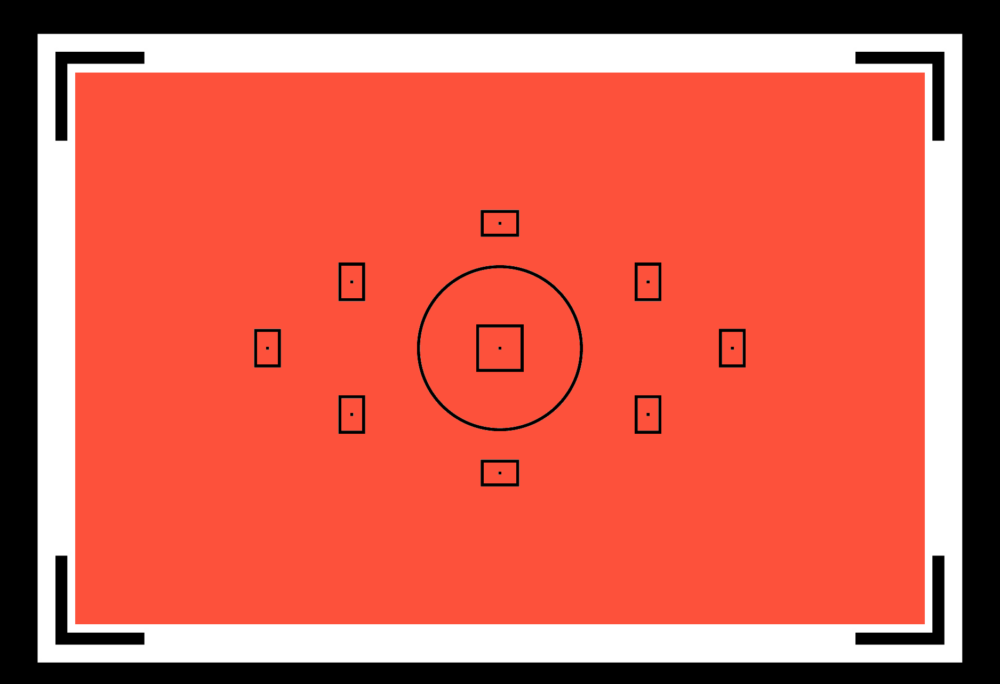
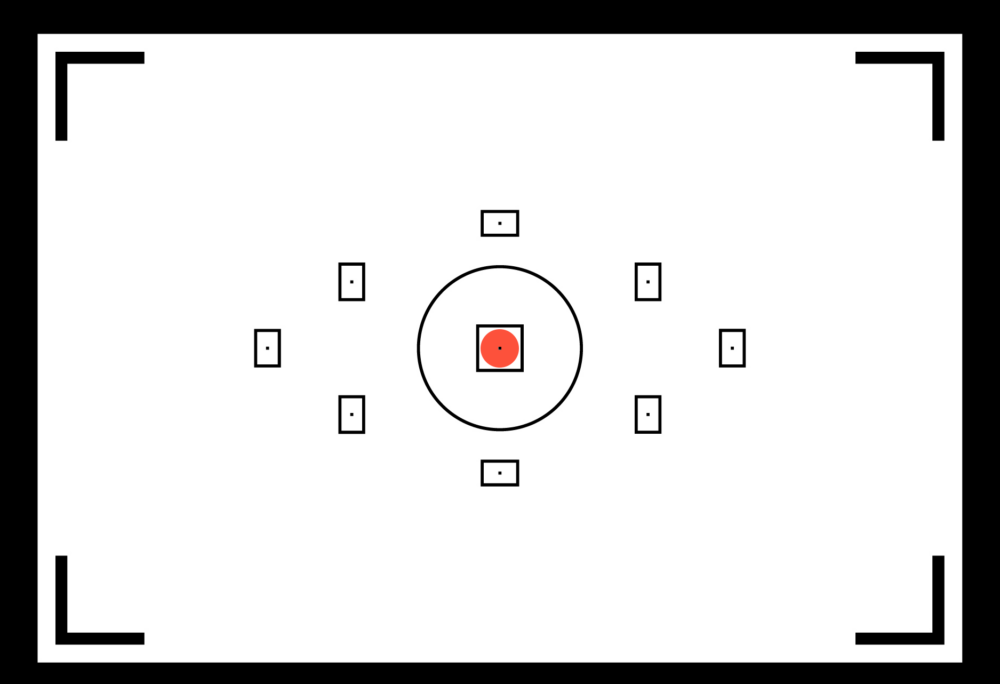
Partial Metering: Focusing on the Center
Partial metering measures light from the center of the frame. It ignores the outer edges. The area measured is usually a small circle. It takes up about 6-10% of the frame.
How Partial Metering Works
Partial metering concentrates on the central area. The camera assesses the brightness of this zone. It then sets the exposure based solely on this central measurement. Light from the periphery is disregarded.
When to Use Partial Metering
Partial metering works well when subjects are brighter than their backgrounds. Think of portraits with bright backgrounds. Or a subject in direct sunlight surrounded by shadows. In these cases, partial metering ensures proper exposure of the main subject.
When to Avoid Partial Metering
Avoid using it in scenes where the central area isn’t representative. Also, it doesn’t work well for wide-angle shots. If the important details are on the edges, then partial metering will underexpose the entire image.
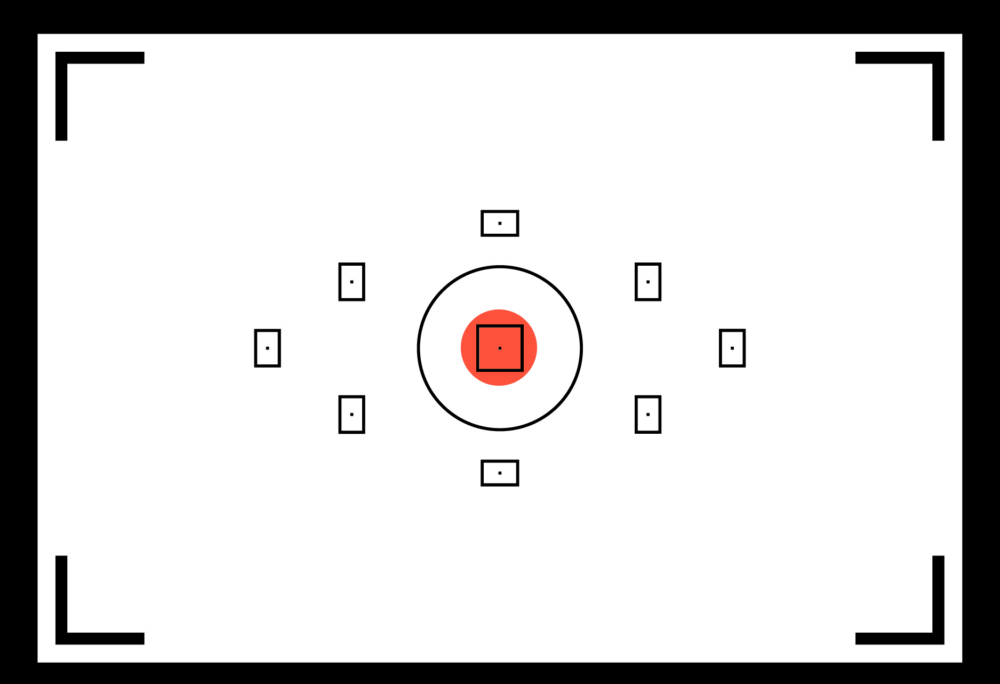
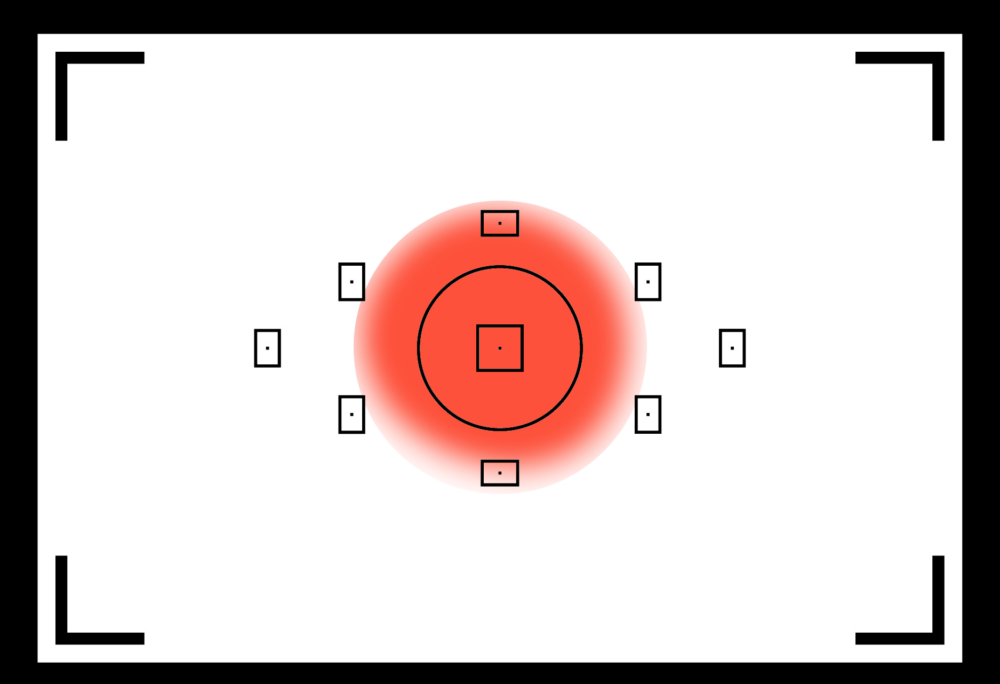
Spot Metering: Pinpoint Accuracy
Spot metering provides precise control. It measures light from a very small area. It typically measures about 1-5% of the scene. This allows you to target a specific tone.
How Spot Metering Works
Spot metering works with precision. It allows you to measure light from one specific spot. The camera ignores the rest of the scene. You can pinpoint the exact tone you want to expose correctly.
When to Use Spot Metering
Use spot metering for challenging lighting. Also use it for stage photography. It excels in macro photography too. If a subject is much brighter or darker than the background, use spot metering. It gives you the ultimate control over exposure.
When to Avoid Spot Metering
Spot metering struggles with movement. It also has problems with precise targeting. If the subject moves quickly, it becomes hard to keep the spot meter on the correct area. This metering mode requires patience and a steady hand.
Center-Weighted Average Metering: A Balanced Approach
Center-weighted average metering balances the entire scene. More weight gets added to the center. This mode measures the light throughout the frame. But, the center of the frame has more influence on the exposure.
How Center-Weighted Average Metering Works
This metering mode blends overall scene assessment. But, it emphasizes the central area. The camera measures light from all over. The light meter gives more importance to the center of the image.
When to Use Center-Weighted Average Metering
Center-weighted metering suits portraits well. It is also good for general photography. Keep your subject centrally located when using this mode. It is a good default option in many cases.
When to Avoid Center-Weighted Average Metering
Avoid scenes with strong backlighting. Also avoid scenes where the edges matter. The camera will not measure the extreme brightness. It will try to compensate. This can affect the overall exposure of the photo.
Mastering Metering: Tips and Techniques
Improving your metering accuracy leads to better photos. Try these practical tips and techniques. You will get consistently excellent exposures.
Understanding Histograms
Histograms are vital for exposure. It shows the distribution of tones in your image. The left side represents shadows. The right side shows highlights. An ideal histogram stretches across the entire range. It avoids clipping at either end.
Using Exposure Compensation
Exposure compensation fine-tunes metering. Use the +/- EV button to adjust brightness. If the image is too dark, add positive exposure compensation. If it’s too bright, use negative compensation. Small adjustments make a big difference.
Metering in Manual Mode
Use manual mode for complete control. Meter the scene using the camera’s meter. Then, set the aperture, shutter speed, and ISO manually. Adjust until the meter reads zero. This gives you full creative control.
Other Metering Modes
Some Nikon cameras offer highlight-weighted metering, which meters for the highlights to ensure they are not overexposed. This mode is also available in some Sony cameras, too. Sony also offers a fifth option in some cameras – entire screen avgerage – that measures the brightness of the entire scene as a whole.
When Metering Is Not The Answer
There will be times when taking landscape photos that the difference between the highlights and shadows is more than the camera sensor is capable of capturing in a single shot. You could change the metering mode and blend several images, but the easier option is to bracket exposures for an HDR image.
Conclusion
Mastering camera metering modes unlocks your camera’s potential. Each mode suits different situations. Evaluative metering handles everyday scenes. Partial metering focuses on the center. Spot metering offers pinpoint accuracy. Center-weighted averaging balances the frame. Practice experimenting to understand metering. Soon you’ll intuitively know which mode to use for each shot.
A Selection Of Guide Articles
Using Reflections In Landscape Photography
We look at how to best use reflections in landscape photography as the method to add symmetry to you compositions
Adapting A Vehicle For Landscape Photography
We talk about the thought process and steps we took to make life easier when adapting a vehicle for landscape photography
RAW Format Photography
Understanding Camera RAW format files and why they are best for photographers wanting optimal image quality and processing flexibility
Mastering Exposure
Mastering exposure requires understanding of the three principal mechanisms: shutter speed, aperture size, and the photographic material's level of sensitivity to light (ISO)
Essential Filters for Landscape Photography
Read about the essential filters for landscape photography to make your life easier and take your images to the next level
How To Photograph Winter Landscapes
How to photograph winter landscapes, gear, what you need to consider and understanding the how snow affects light
Planning A Photography Roadtrip
A guide to planning a photography roadtrip. How to find locations, what to pack and tips to get the most from your trip
Create Dramatic Landscape Photos
Luck, light, skill and perseverance are just some of the facets needed to create dramatic landscape photos