Golden hour is by far the best time for stunning landscape photos. It’s when the light turns warm and soft, making everything look magical. This tiny window of time can transform simple scenes into breathtaking images. But golden hour doesn’t last long. To make the most of it, proper planning and quick thinking are essential. If you want to master landscape photography during golden hour, this is your perfect starting point.
Understanding Golden Hour: Timing and Characteristics
What is Golden Hour?
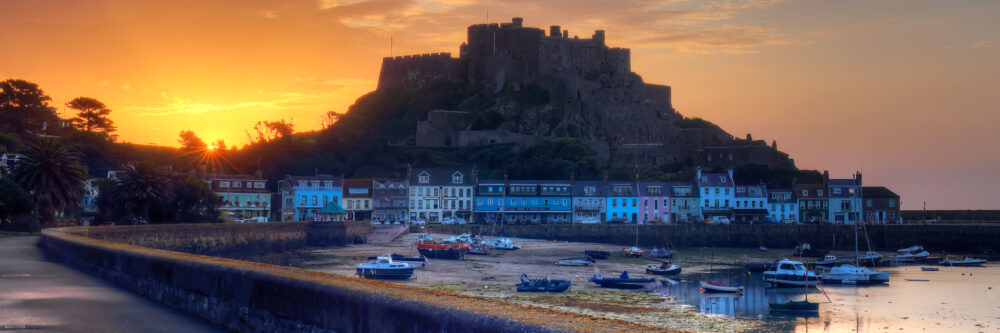
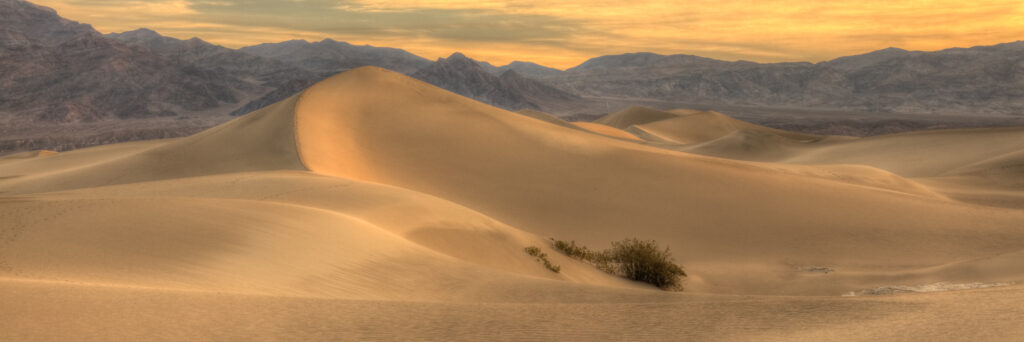
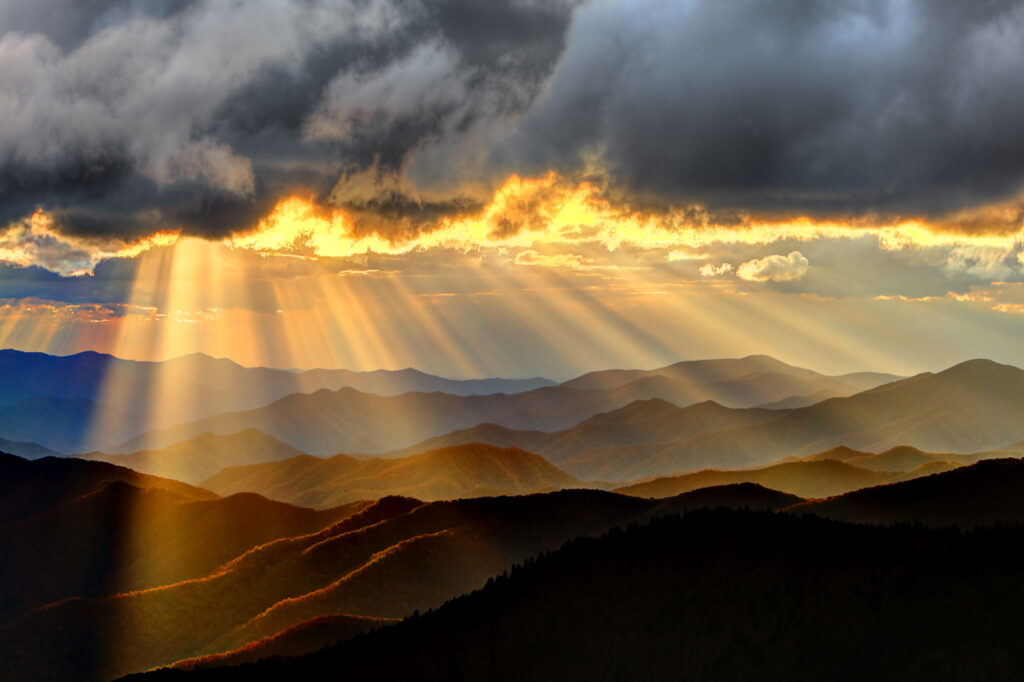
Like a stopped clock being right, golden hour happens twice a day – just after sunrise and just before sunset. It’s when the sun is low in the sky, casting a warm, golden hue across the landscape. The light during this time is gentle, with soft shadows that add depth. It’s perfect for bringing out the textures in rocks, trees and water.
When Does Golden Hour Occur?
Don’t expect golden hour to last for an hour. Timing varies depending on your location and the time of year. Morning golden hour, also known as the magic hour, generally starts about 20-30 minutes before sunrise, lasting until the sun rises. In the evening, it’s the reverse – about 20-30 minutes before sunset until the sun sets. The exact length shifts based on geography and latitude and don’t forget sunrise/sunset times change every day too! Using an app like PhotoPills or PhotoEphemeris helps you plan ahead and catch the best light. A simple web search will yield a multitude of websites that can deliver specific times for specific location. MrsFaceless and I always use a specific location when checking sunrise and sunset times to get the most accurate data. There’s also a myriad of golden hour calculators online.
Why Golden Hour Enhances Landscape Photography
During golden hour, shadows are less harsh and colours pop without overexposure. This light makes details stand out and textures more visible. It also creates mood, making scenes feel warm and inviting. Many renowned landscape photographers swear by golden hour as their favorite shooting time. Ansel Adams once said, “The magic is in the light,” and golden hour proves it.
Essential Equipment for Golden Hour Landscape Photography
Camera Settings for Perfect Shots
To get great shots, use manual mode when possible. Set your aperture between f/8 and f/16 to maximize depth of field. Keep ISO low (like 100-200) for the cleanest, noise free images. Shutter speed depends on your scene and what you ar trying to achieve. Slower speeds can blur motion, like moving water or clouds, for a dreamy effect. White balance can be set to “cloudy” or “shade” to boost warmth. Remember, shooting RAW allows you to make more non-destructive changes in post processing.
Lens Selection and Accessories
Wide-angle lenses are best for capturing broad landscapes during golden hour. Consider a 16-35mm or similar. A sturdy tripod is a must to achieve sharp results on longer exposures, especially when light is fading. A telephoto will allow you to capture vignettes, but these may not convey the full beauty of the golden light. You should always carry a micro fibre cloth for general dusting/shielding purposes as well as a lens cleaning kit to keep your glass clear in outdoor settings.
Additional Gear Tips
Filters can add extra punch to your photos. Use a polarizer to cut reflections and boost colours. Neutral density (ND) filters help you slow shutter speed for dreamy water or cloud effects. Always have extra batteries and clean your lens regularly to avoid missing perfect moments.
Composition Tips to Maximize Golden Hour Magic
Leveraging Natural Features and Foreground Elements
The rules of composition do not change, even when you have such gorgeous golden light. Include interesting things in your foreground such as rocks, trees, or flowers. These add depth and guide viewers into your scene. Use the rule of thirds to position horizon lines or focal points for a balanced shot. Leading lines like streams or fences draw viewers’ eyes through the photo.
Utilizing Light and Shadow
Position yourself so the sunlight highlights your main subjects. Watch how shadows change as the sun dips lower. Shadows can add drama or mystery to your scene. Anticipate how light will shift and be ready to adjust your composition, or indeed your position.
Creative Techniques
Reflections in lakes or puddles create mirror-like images that double the visual impact. Silhouettes, dark shapes against bright skies, can tell powerful stories with minimal light. Play around with both for unique shots. Don’t forget the chance to shoot a sun star should the opportunity present it!
Practical Tips to Capture Stunning Golden Hour Landscapes
Planning and Timing
Use apps to know the exact golden hour times. Check the weather forecast as cloudy days can soften light beautifully, while clear bright days might be harsher. Try to always arrive early to scout locations and set up your gear. Scouting a location the day before helps for early morning shoots, rather than guessing or stumbling around in the dark.
Camera Settings and Shooting Techniques
Bracket your shots for HDR if the scene has high contrast. Take multiple exposures to blend later in post, getting both bright sky and shadow details right. Be patient and stay alert; the light changes quickly during golden hour, so don’t wait too long to shoot. Make sure your memory cards have enough free space – it’s better to have too many images than not enough!
Post-Processing for Golden Hour Images
When it comes to post processing, generally an adjustment to boost warmth and contrast slightly really helps to enhance that golden glow. Adjust shadows and highlights to balance the image. Avoid the temptation to crank up the saturation and overdoing it – staying natural preserves the scene’s real magic.
Conclusion
Shooting landscape photos during golden hour offers unmatched beauty and emotion. It’s about preparation, quick reflexes and knowing how to use light to your advantage. With the right gear, composition, and timing, you can turn simple landscapes into art. Patience and practice are key – so get out there and chase that golden hour glow! You never know when Mother Nature will gift you a picture-perfect scene.
A Selection Of Guide Articles
Adapting A Vehicle For Landscape Photography
We talk about the thought process and steps we took to make life easier when adapting a vehicle for landscape photography
RAW Format Photography
Understanding Camera RAW format files and why they are best for photographers wanting optimal image quality and processing flexibility
Mastering Exposure
Mastering exposure requires understanding of the three principal mechanisms: shutter speed, aperture size, and the photographic material's level of sensitivity to light (ISO)
Essential Filters for Landscape Photography
Read about the essential filters for landscape photography to make your life easier and take your images to the next level
How To Photograph Winter Landscapes
How to photograph winter landscapes, gear, what you need to consider and understanding the how snow affects light
Planning A Photography Roadtrip
A guide to planning a photography roadtrip. How to find locations, what to pack and tips to get the most from your trip
Create Dramatic Landscape Photos
Luck, light, skill and perseverance are just some of the facets needed to create dramatic landscape photos
Landscape Photography: Portrait vs. Landscape Orientation
Comparing composition techniques and when to use landscape versus portrait orientation