
Landscape photography is one of the most popular ways to capture the beauty of the outdoors. Whether it’s mountains, lakes, or forests, a great shot can turn a simple scene into art. To do that, photographers need sharp images with just the right exposure. That’s where the reciprocal rule comes in. It’s a simple but powerful technique to keep your photos clear and crisp. Understanding and using this rule can make your landscape pictures look professional and lively. Ready to learn how to use it and see your images improve?
Understanding the Reciprocal Rule in Landscape Photography
What Is the Reciprocal Rule?
The reciprocal rule is a quick way to choose a shutter speed that helps prevent blurry photos caused by camera shake. Basically, it says: set your shutter speed to at least 1 divided by your lens’s focal length. So if you’re using a 50mm lens, your shutter speed should be at least 1/50 seconds. This keeps your camera steady enough to avoid motion blur. Unlike the Sunny 16 rule, which focuses on aperture, the reciprocal rule zeroes in on shutter speed as the key for sharpness in handheld shots. It’s all about stopping tiny movements that shake the camera and cause blurry details.
Why Is the Reciprocal Rule Crucial for Landscape Photography?
In landscape shots, sharpness is everything. You want to see every leaf, mountain edge, and distant tree clearly. When you use the reciprocal rule, it helps you keep the image crisp, especially with fine textures. For example, waterfalls and rivers need fast shutter speeds to freeze their motion or slow ones for a silky look. Trees swaying in the wind also need correct shutter speeds to avoid fuzziness. Experts say most camera shake happens below certain shutter speeds, so following this rule minimizes that risk and keeps images sharp.
The Physics of Camera Shake and Motion Blur
Camera shake happens because even tiny hand movements get captured at slow shutter speeds. The longer the exposure, the more your camera moves. Studies show that for every step below the recommended speed, the chance of blurring increases. Try sticking to the reciprocal rule whenever possible. This technical rule is grounded in physics: faster shutter speeds reduce the window for shake and keep your images clear. When you understand this, it’s easier to plan your shot and avoid losing sharpness.
How to Use the Reciprocal Rule Effectively in Landscape Photography
Calculating the Recommended Shutter Speed
Here’s how to figure out your minimum shutter speed: divide 1 by your lens’s focal length. For example:
- With a 24mm lens, shoot at least 1/24 seconds.
- With a 70mm lens, aim for 1/70 seconds.
- For a 200mm lens, use 1/200 seconds or faster.
If you’re using a camera with image stabilization, you might get away with slower speeds, about half the recommended time. Always remember, the longer your lens, the faster your shutter speed needs to be.
Optimal Settings for Different Landscape Scenarios
- Waterfalls or flowing streams: Use fast shutter speeds to freeze water motion or slow ones for a dreamy feel.
- Windy days with trees or grass: Keep the shutter speed high enough to prevent motion blur.
- Low-light scenes: Increase ISO or open your aperture to let in more light, allowing you to use the reciprocal speed without underexposing.
Incorporating the Reciprocal Rule with Other Techniques
Pair the rule with your aperture settings to get the right depth of field. Use smaller apertures (like f/11 or f/16) for sharper focus. When long exposures are needed, ND filters can slow down the light, extending shutter speeds beyond the reciprocal rule. Also, a tripod is your best friend—stabilizing your camera ensures sharper images, especially in tricky light or windy conditions.
Advanced Tips and Common Mistakes to Avoid
When to Break the Reciprocal Rule
Sometimes, you want a softer water look or a motion-blurred scene. In those cases, a longer shutter speed creates that effect. Think of capturing a waterfall with a silky flow – it’s a creative choice. But wanting the water to be silky doesn’t mean the whole photo should be blurry. Practice handheld to see where the limits are for both you and your camera. Use a tripod to be safe and be mindful of the extra motion your longer exposure might pick up.
Troubleshooting Common Issues
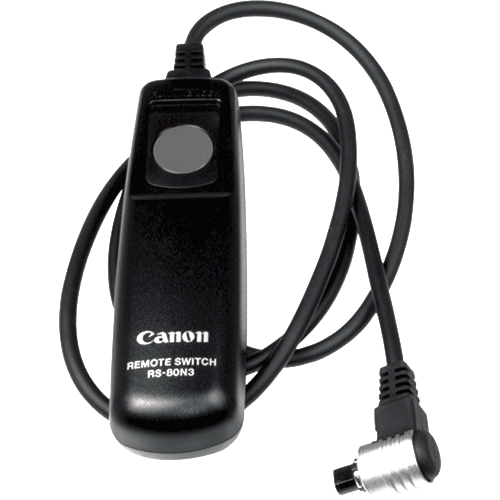
You might find your images blurry even when following the rule. This can happen if your camera is vibrating on uneven terrain or if your tripod isn’t firm enough. MrsFaceless and I encountered this on atrip to West Virginia. We were shooting from an old, one lane bridge with constant traffic which caused the bridge to shake. To avoid this, use a sturdy tripod and a remote shutter release to minimize vibrations. Also, double-check that your image stabilization is turned on if your camera has it – something you don’t normally have on when tripod mounted. Paying attention to setup makes a big difference.
Real-World Examples and Case Studies
Many pro photographers follow or break the reciprocal rule on purpose. Ansel Adams often used very slow shutter speeds to create mood and softness. Jimmy Chin, known for adventure shots, strictly follows the rule to keep his images sharp even in rapid action scenes. Their success shows how understanding and using shutter speed correctly impacts the final picture.
Look at famous landscape photos online. They often show sharp details, revealing that the photographer was mindful of shutter speed. When they used the reciprocal rule thoughtfully, their images turned out clear and vibrant.
Actionable Tips for Landscape Photographers
- Before shooting, check your camera’s minimum shutter speed based on your lens.
- Use a tripod and remote shutter release for longer exposures.
- Try adjusting shutter speed in different light and weather conditions to see what works.
- Review your photos afterward, noticing when sharper images happened at the recommended speeds.
- Practice makes perfect. The more you experiment, the better you’ll understand how the reciprocal rule affects your shots.
Conclusion: Elevate Your Landscape Photography with the Reciprocal Rule
The reciprocal rule is a simple yet effective way to improve your landscape photos. It helps prevent blurry images by guiding your shutter speed. When you understand how to use it and combine it with other techniques like using filters and tripods, your pictures will look more professional and captivating. Don’t be afraid to experiment—sometimes breaking the rule can also lead to creative results. Keep practicing, and your landscape photography skills will skyrocket, enabling you to capture nature’s beauty with clarity and style.
A Selection Of Guide Articles
Using Reflections In Landscape Photography
We look at how to best use reflections in landscape photography as the method to add symmetry to you compositions
Adapting A Vehicle For Landscape Photography
We talk about the thought process and steps we took to make life easier when adapting a vehicle for landscape photography
RAW Format Photography
Understanding Camera RAW format files and why they are best for photographers wanting optimal image quality and processing flexibility
Mastering Exposure
Mastering exposure requires understanding of the three principal mechanisms: shutter speed, aperture size, and the photographic material's level of sensitivity to light (ISO)
Essential Filters for Landscape Photography
Read about the essential filters for landscape photography to make your life easier and take your images to the next level
How To Photograph Winter Landscapes
How to photograph winter landscapes, gear, what you need to consider and understanding the how snow affects light
Planning A Photography Roadtrip
A guide to planning a photography roadtrip. How to find locations, what to pack and tips to get the most from your trip
Create Dramatic Landscape Photos
Luck, light, skill and perseverance are just some of the facets needed to create dramatic landscape photos