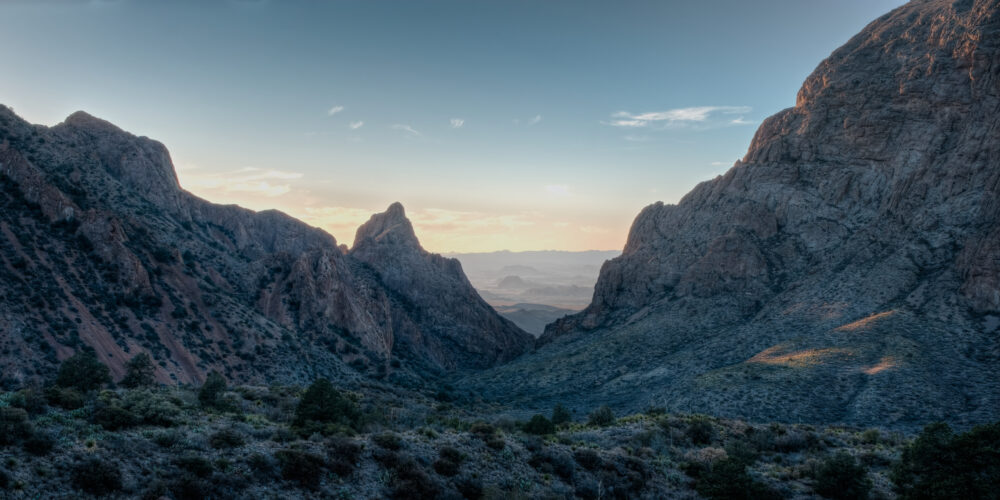
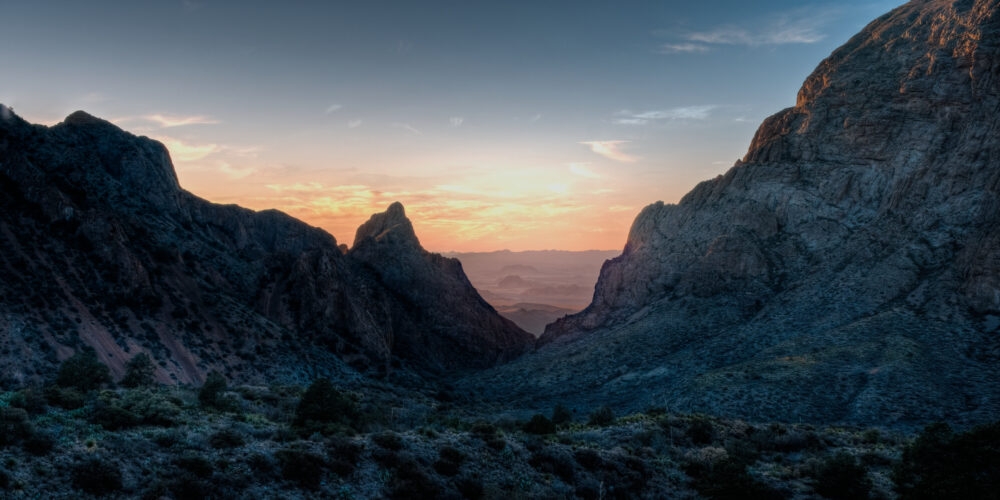
Imagine standing at the edge of a jagged rock frame as the sun dips low, painting the vast Chihuahuan Desert in fiery oranges and deep purples. That’s the magic of landscape photography at The Window in Big Bend National Park. This spot draws photographers from all over with its raw power and endless views.
The Window sits high in the Chisos Mountains, offering a perfect notch that frames the park’s wild beauty. You get dramatic desert vistas that mix stark cliffs with subtle life below. It’s not just about snapping pics. It’s about blending your skills with nature’s show.
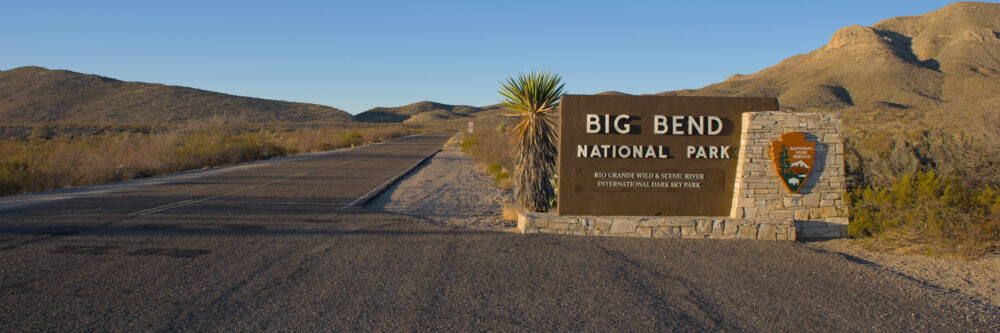
Big Bend covers over 800,000 acres of rugged land in west Texas. Its geology comes from ancient volcanoes and erosion over millions of years. Here, you capture not only beauty but also the earth’s story in every shot.
This trail works for many skill levels. Even if you’re new, the 5.6-mile round trip feels rewarding without being too tough. You’ll hike through oaks and past boulders, snapping biodiversity against those bold rocks. It changes how you see the world through your lens.
In this guide, we cover planning your trip, composing shots, technical tricks, and editing tips. You’ll leave ready to grab those iconic images. Let’s dive in and make your Big Bend adventure count.
Planning Your Visit to The Window for Optimal Photography
You want to hit The Window in Big Bend National Park when conditions line up just right for killer photos. Good prep means less hassle and more time behind the camera. Focus on timing, gear and safety to nail your landscape photograph.
This section helps you sort logistics so you arrive sharp and set. No one likes rushing in the heat or missing light. Think ahead for the best shots.
Best Time of Year and Day for Shooting
Spring from March to May brings mild temps around 70 degrees and pops of wildflowers. You can frame those blooms against the Window’s edges for extra color. Fall in September through November offers clear blue skies and cooler air, perfect for long hikes.
Skip summer. Temperatures hit 100 degrees and feel brutal on the trail. Winter works too, but pack for chills below freezing. For the day, aim for golden hour at sunrise or sunset. That’s when shadows stretch long across the Pour-Off walls, adding depth to your desert scenes.
Check apps like Windy for forecasts. Or Astropheric for moon phases. The right light matters for night shots. Full moons light up the notch like day. Plan around partly cloudy skies to catch light play on rocks.
- Sunrise: Soft light highlights east-facing cliffs.
- Sunset: Warm glows flood the desert floor.
- Night: Stars frame the Window for Milky Way pulls.
These times boost your chances for standout landscape photography at The Window.
Essential Gear and Packing List
Pack light but smart for the hike. A wide-angle lens like 16-35mm grabs those big views through the notch. Tripods keep things steady in low light, especially at dawn or dusk.
Don’t forget filters. An ND for long exposures on moving clouds and a polarizer to cut glare off rocks. Your camera body should handle dust, so go for weather-sealed if you can. Add extra batteries as cold drains them quickly. Plus, there’s nothing worse than running out of power just as the composition and elements all come together!
Layers help with temp swings from 40 degrees or less at night to 80 plus by noon. Toss in a headlamp for the return hike if you linger for stars. Water bottles or a hydration pack are musts.
Here’s a quick list:
- Camera with wide lens.
- Sturdy tripod.
- Filters and lens cloth.
- Snacks and water.
- Hat, sunscreen, sturdy boots.
- Extra batteries!
This setup lets you focus on shooting, not fumbling.
Permits, Safety and Trail Logistics
Big Bend entry fees vary, as do the various permits. Check out either developed campgrounds or backcountry/primitive roadside camping for the more adventurous.
The Window can be seen from Chisos Mountain car park. If you hike to The Window it will be a several hour round trip. Check for closures from flash floods or impending rains.
Carry at least two liters of water per person. Dehydration hits quick in dry air. Watch for rattlesnakes and steep drops near the pour-off. Start early to beat crowds and heat.
Download the National Park Service app for trail maps and updates. It shows real-time weather and wildlife alerts. The trail starts from Basin campground so park there and follow signs.
- Water: Refill at the visitor center.
- Snacks: To keep energy level up.
- Flashlight: For any delays.
- First aid: Basics like bandages.
Safe prep means you enjoy the views without worry.
Understanding the Landscape and Composition Techniques
The Window’s spot in the Chisos Mountains shapes every photo you take. Learn its parts to build strong frames. This knowledge turns simple snaps into art for your Big Bend landscape photography.
Grasp the lay of the land first. Then, play with angles to show its scale. Seasons add twists that keep shots fresh.
Key Geological Features to Photograph
The Window is a V-shaped cut in the mountain wall, carved by erosion over thousands of years. It frames the endless desert below, with basalt cliffs rising sharp on both sides. The Pour-Off below acts like a natural funnel for rare rains.
Oaks cling to the slopes, their green a stark pop against gray rocks. Agaves and cacti dot the foreground, adding texture. At 6,300 feet, elevation gives you that high vantage over the plain.
Scout these spots on the trail. Use oaks in front to lead eyes to the opening. The rule of thirds puts the Window off-center for balance—try it and see the difference.
This mix of features makes The Window a top pick for Chisos Mountains photography.
Mastering Composition for Dramatic Vistas
Leading lines from the trail pull viewers right to the frame. The path winds like an arrow toward that desert peek. Balance empty space out there with busy rocks up close.
Go vertical for tall walls that tower like giants. Horizontal works best for sunsets spreading wide.
Place key rocks at grid lines in your viewfinder. Avoid centering everything; it feels flat. Experiment with low angles which makes the Window loom larger.
These tricks help your landscape photography at The Window in Big Bend National Park stand out.
Incorporating Seasons and Weather Variations
Monsoon rains in late summer spark rainbows arching through the notch. Winter snow caps the peaks, turning the scene white and crisp. Spring greens the trail with flowers that frame your shots.
Clouds add drama. Scattered ones texture the sky without blocking light. Skip midday fog that softens details. Check forecasts for wind. Calm days let you use slower shutters.
Plan for partly cloudy afternoons. They scatter light on cliffs for depth. Each season shifts the mood, so mix visits if you can.
Variety keeps your portfolio alive.
Technical Tips for Shooting at The Window
Desert light throws curveballs like harsh shadows and wind. Master settings to handle them. These steps suit folks with some camera know-how, aiming for sharp, detailed images.
Build on basics here. Adjust for the site’s quirks. You’ll get pro-level results.
Camera Settings for Desert Light Conditions
Bracket shots at plus or minus two stops for HDR blends. That pulls in dark canyons and bright sands without losing punch. Keep ISO low, 100 to 400, to cut noise in sunny spots.
Set aperture to f/8 or f/11 for crisp edges on rocks. Shutter over 1/100th second fights wind shake on your tripod. Shoot in RAW for more room to tweak later.
Test exposures as light changes. Golden hour needs faster tweaks than noon blaze. Practice these and your exposures nail the contrast.
Handling Challenges Like Dust and Elevation
Dust storms kick up in the Chisos, so seal gear in bags. Wipe lenses often with microfiber cloths. At high spots, air thins so breathe steady to stay sharp.
Use live view to nail focus on far horizons. Lock up the mirror to stop shakes on rough ground. A blower bulb clears dust from sensors quick.
Protect batteries from cold. Keep spares warm in pockets.
Wildlife and Macro Opportunities Along the Trail
Javelinas and deer rustle bushes near the Window. Burst mode catches their quick moves. Birds perch on branches. A telephoto lens pulls them in close. For macros, zoom on cactus spines or flower petals.
Remember to keep your distance from the wildlife. Stick to 25 feet away to not spook them. Ethical shots mean no baits or chases. The trail’s mix lets you blend wide vistas with tiny details.
Post-Processing and Sharing Your Big Bend Photos
Raw files from The Window in Big Bend National Park need polish to shine. Editing brings out that desert pop. Share smart to get eyes on your work.
Enhance without faking it. Build collections that tell the park’s tale.
Editing for Vibrant Desert Tones
Pull back sky highlights to keep blues deep. Boost shadows on rocks for texture without mud. Warm up earth colors to match the sunset glow.
Crop tight to stress the Window’s shape. Dodge and burn pick out cliff edges. Aim for a natural look. Over saturation looks fake.
Tools like the adjustment brush target spots. Your edits should feel like you were there again.
Preserving and Archiving Your Images
Backup your photo files as soon as you can and after any edits. Think about a cloud service or a local NAS. Tag files with dates and spots for easy finds. Use a logical naming convention.
Conclusion
Landscape photography at The Window in Big Bend National Park captures a slice of wild Texas magic. From planning golden hour hikes to tweaking tones in edit, each step builds epic shots. Remember mild springs, wide lenses and bracketed exposures for top results.
Pack right, compose with lines and respect the land. Stay on trails and pack out trash. These habits let you connect deep with the Chisos. Head out soon, camera ready, and frame your own desert dreams. Your photos will inspire the next adventurer.