
Composition is important to ensure the right ingredients to grab the viewer’s attention. One aspect of that is symmetry. Using reflections in landscape photography achieves that symmetry. Reflections add something special. They bring depth and add a bit of magic. This article will show you how to take amazing reflection photos. We will look at the gear, locations and tricks to capture stunning reflections.
Understanding the Fundamentals of Reflection Photography
To start, it’s good to know what makes reflections happen. Understanding some basics about light and surfaces help. The best conditions and what things to look for is a good start.
The Science of Reflections: Light and Surfaces
Light bounces off things. Think of it like throwing a ball at a wall. The ball bounces back at the same angle you threw it. Light does the same. This is the basic rule: angle in equals angle out. Smooth surfaces create clear reflections. This is called specular reflection. Rough surfaces scatter light. This is diffuse reflection. You don’t see a clear picture.
Ideal Conditions for Capturing Reflections
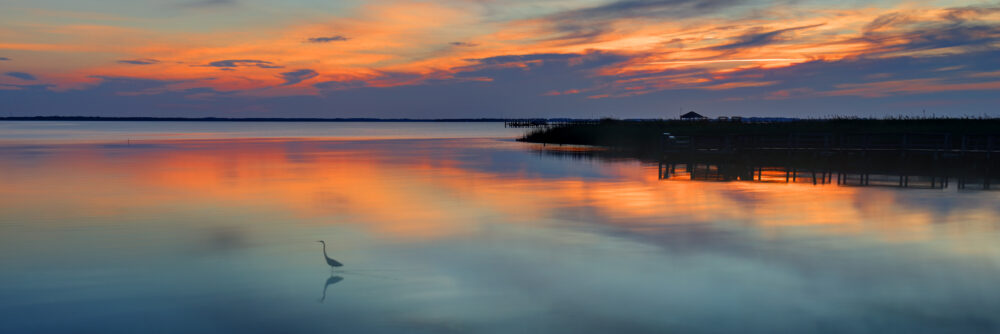
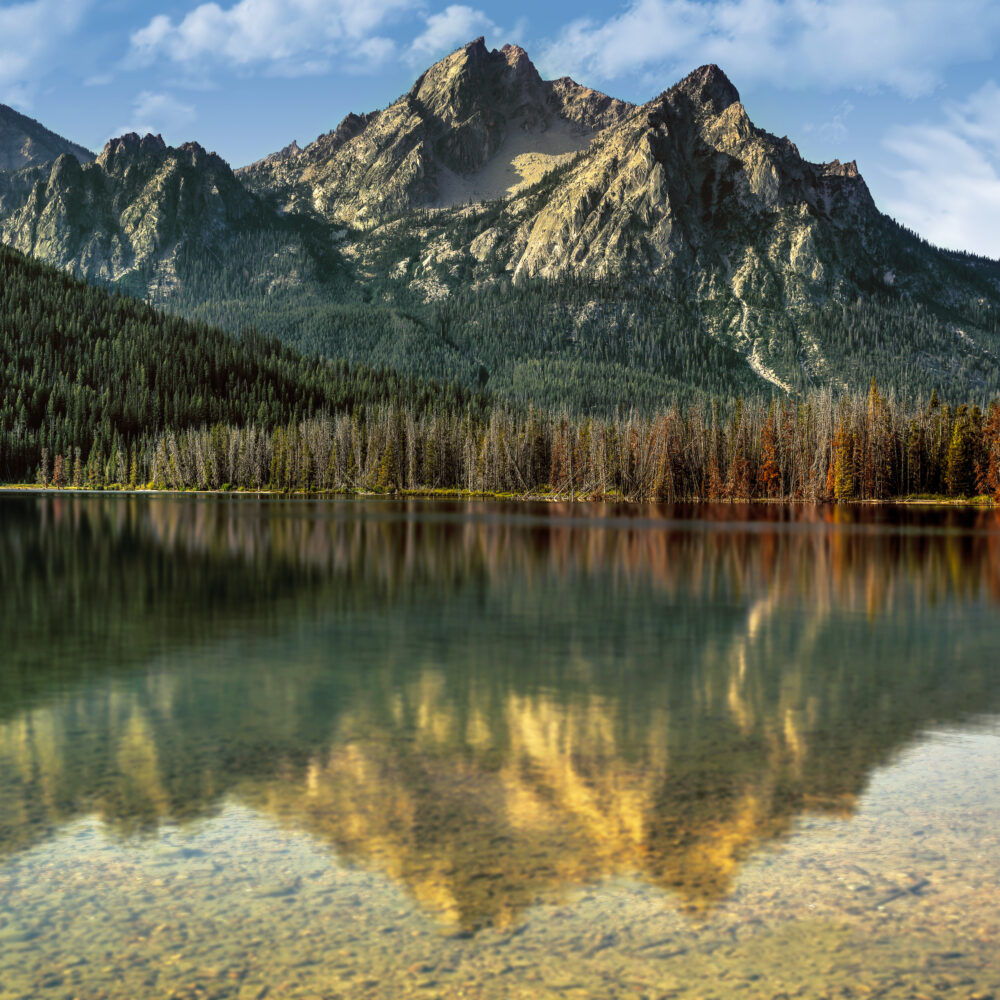
The best time to shoot is during the golden hour. This is right after sunrise and before sunset. The light is soft and warm. The blue hour is another great time. This is when the sky turns deep blue. Calm winds are important too. if you are using water as your reflective surface. Overcast days can also be good. Clouds act like a big softbox, spreading light evenly. Seasons matter. Fall colours reflecting in a lake can be amazing.
Identifying Reflective Surfaces in Nature
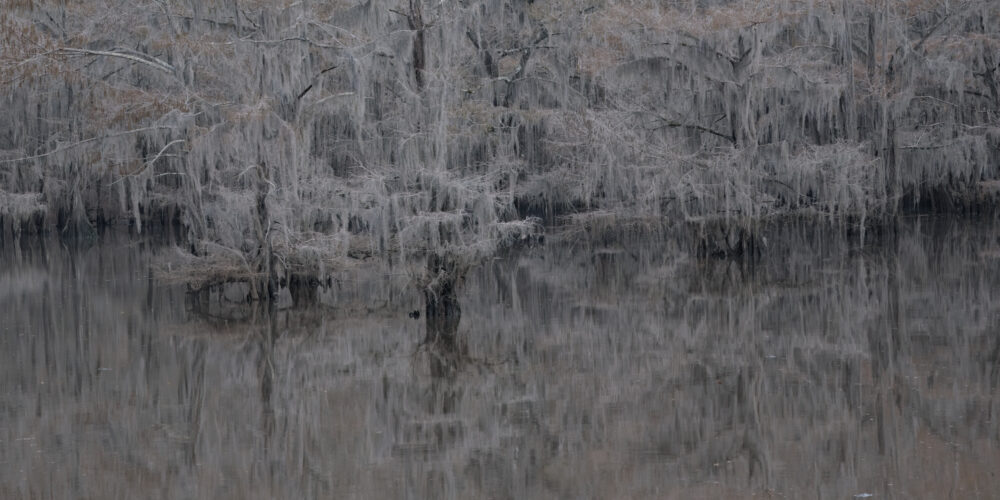
Lakes are great for reflections. Ponds and rivers work too. Even puddles can give cool effects. Wet sand on a beach is also good. After a rain, the world transforms. Snow and ice can reflect light in interesting ways. Look for still water or shiny surfaces. In urban areas it could be metal surfaces, or windows. Keep your eyes open for these chances.
Gear and Camera Settings for Reflection Shots
Having the right gear can make a big change. Often using reflections in landscape photography requires a longer exposure. Therefore, a tripod is super important, as is patience. It may be a case of waiting for the sun to be in exactly the right spot. Camera settings also need to be just right. This all helps to get crisp and eye-catching reflection pictures.
Essential Camera Gear
A tripod is a must. It keeps your camera steady. This is critical if the images being taken need to be stacked for a composite later on. A wide-angle lens helps capture more of the scene. A polarizing filter cuts down glare. A remote shutter release or timer delay reduces camera shake. These things help your photos look their best.
Optimal Camera Settings
Aperture controls depth of field. Use a smaller number (like f/8 or f/11) to get everything in focus. Keep ISO low to avoid grain. Adjust shutter speed to prevent blurring. Manual focus might be needed. Auto-focus can struggle with reflections.
Using Filters to Enhance Reflections
Polarizing filters are helpful. They reduce glare on water. Rotate the filter to change the effect but not so much it removes all of the reflection! Neutral density filters let you use slower shutter speeds. This can blur water for a dreamy look. This works extremely well and is common for cityscape reflection capturing the lights at night. Filters are worth trying out.
Composition Techniques for Captivating Reflections
How you set up your shot matters a lot. Think about where to put things in the frame. Using some basic ideas helps achieve stronger reflections in landscape photography images.
Rule of Thirds and Symmetry
The rule of thirds divides the scene into nine squares. Place key parts along these lines or where they meet. Symmetry works well with reflections. Put the horizon in the middle. This makes a balanced photo.
Leading Lines and Reflections
Leading lines guide the eye. A path or river can lead to the reflection. This draws viewers into the picture. Look for lines that add interest.
Breaking the Symmetry: Imperfect Reflections
Sometimes, breaking symmetry makes a photo better. A ripple in the water or fog can add drama. Don’t be afraid to change things up. Try taking photos when things aren’t perfect.
Finding and Scouting Reflection Locations
Finding good spots is key. Some places are just made for reflections. Planning your shoot also helps.
Best Types of Locations for Reflections
Mountain lakes often have clear reflections. Coastal areas can be good at sunrise or sunset. Marshes offer unique reflections. Urban spots with water features can also be great.
Utilizing Weather Forecasts
Check the weather before you go. Look for calm winds. Use an app like Windy for that. Watch for cloud cover. Rain can make puddles for reflections. Planning ahead increases your chances.
Hunting Online
Use online maps or search through photo websites like 500px to find locations. Look for lakes or ponds. See how the light hits at different times. Online resources can also give ideas. Research before you head out.
Post-Processing Tips for Reflection Photography
Editing your photos can make them pop. Simple changes can bring out the best in your reflection pictures.
Basic Adjustments
Adjust exposure to brighten or darken the image. Increase contrast to make details stand out. Adjust highlights and shadows to balance the light. Change white balance to fix colour issues. Sharpening makes the image look crisper. Be selective and don;t overdo the post processing. Keep the image looking natural.
Correcting Perspective and Distortion
Wide-angle lenses can cause distortion. Use lens correction tools to fix this. Straighten lines to make the photo look more natural. Perspective adjustments can improve the image.
Enhancing Colours and Details
Selective adjustments can enhance colours. Bring out the blues in the sky. Make the greens in the trees richer. Adjust details in the reflection. This makes the image more interesting.
Conclusion
Taking great reflection pictures takes time. It also needs practice. Understand light and composition. Reflections can change your landscape photos. Be patient. Experiment with reflections. Have fun!
A Selection Of Guide Articles
Using Reflections In Landscape Photography
We look at how to best use reflections in landscape photography as the method to add symmetry to you compositions
Adapting A Vehicle For Landscape Photography
We talk about the thought process and steps we took to make life easier when adapting a vehicle for landscape photography
RAW Format Photography
Understanding Camera RAW format files and why they are best for photographers wanting optimal image quality and processing flexibility
Mastering Exposure
Mastering exposure requires understanding of the three principal mechanisms: shutter speed, aperture size, and the photographic material's level of sensitivity to light (ISO)
Essential Filters for Landscape Photography
Read about the essential filters for landscape photography to make your life easier and take your images to the next level
How To Photograph Winter Landscapes
How to photograph winter landscapes, gear, what you need to consider and understanding the how snow affects light
Planning A Photography Roadtrip
A guide to planning a photography roadtrip. How to find locations, what to pack and tips to get the most from your trip
Create Dramatic Landscape Photos
Luck, light, skill and perseverance are just some of the facets needed to create dramatic landscape photos