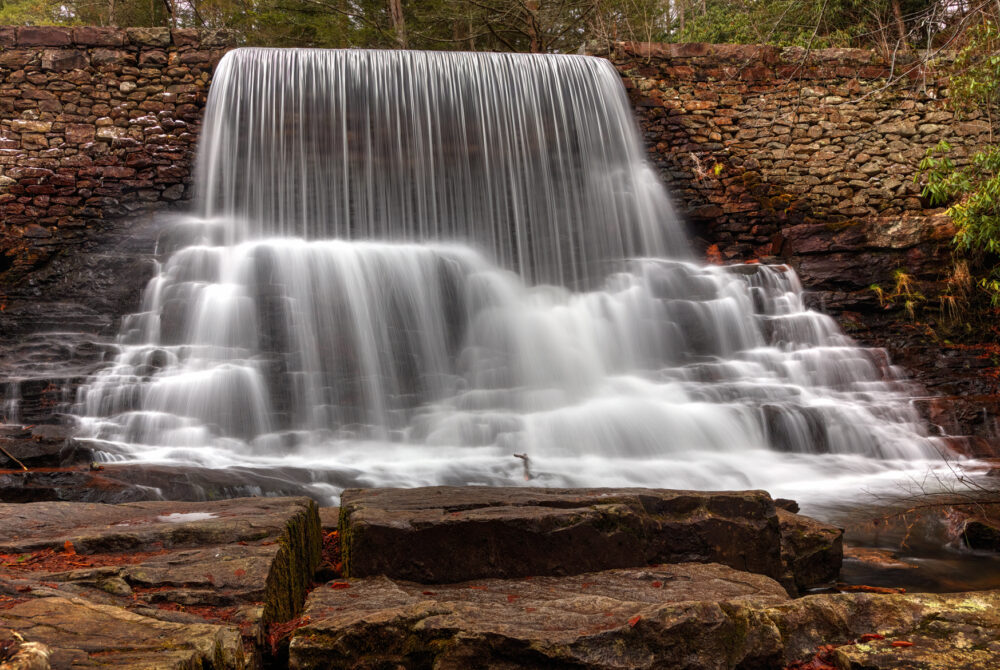
Imagine a photo of a waterfall. The water looks like smooth, flowing silk. That’s the magic of long exposure photography. This technique lets you capture motion in a still image. It transforms ordinary scenes into dreamy, ethereal art. You can also use long exposure with seascapes, cityscapes and even portraits.
Basics of Long Exposure Photography
Long exposure photography involves using a slow shutter speed. This captures movement over an extended time. It’s how you blur clouds or smooth out water. The shutter speed is a key factor.
Shutter Speed: The Key to Long Exposure
Shutter speed controls how long the camera’s sensor is exposed to light. With short shutter speeds, like 1/250 of a second, you freeze motion. In contrast, long shutter speeds, often several seconds or even minutes, blur motion. For example, a 5-second exposure will smooth out waves. A 30-second exposure could turn clouds into streaks across the sky.
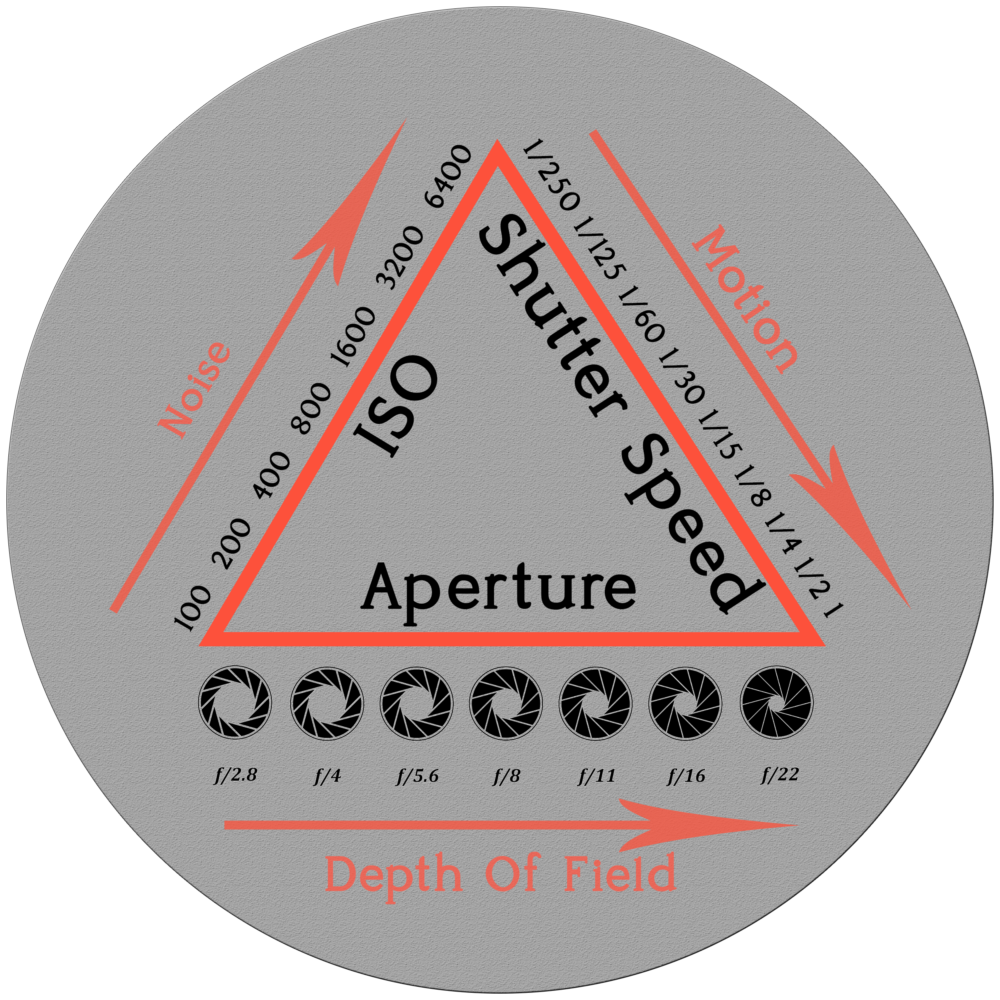
The Exposure Triangle in Long Exposure
The exposure triangle consists of shutter speed, ISO, and aperture. In long exposure, shutter speed is the star. You’ll need to adjust ISO and aperture to balance the light. Use a low ISO (like 100) to minimize noise. Choose your aperture based on the depth of field you want. A smaller aperture (like f/16) gives a large depth of field. It keeps everything in focus.
Why Use Long Exposure?
Long exposure lets you achieve unique creative effects. Motion blur is a classic example. Smooth water is another. Light trails from cars at night create stunning images. It’s a great way to show the passage of time in a single photo.
Essential Gear for Long Exposure Photography
Having the right gear is vital for long exposure shots. A tripod, ND filters and a remote shutter release are all usefull tools to have on hand.
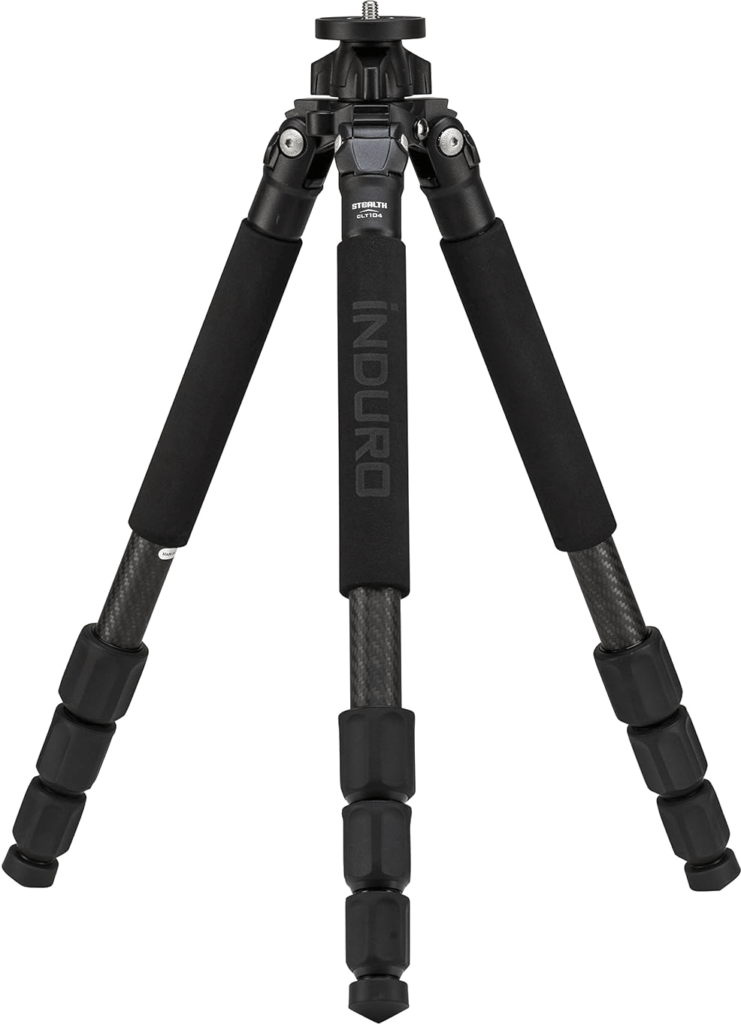
A Sturdy Tripod
A tripod keeps your camera steady during long exposures. Even the slightest movement can ruin your shot. Choose a tripod that’s strong enough to support your camera and lens. Carbon fiber tripods are light and stable, plus they are relatively affordable these days.
Neutral Density (ND) Filters
ND filters reduce the amount of light entering your lens. This lets you use slower shutter speeds in bright conditions. ND filters come in different strengths. The key is to check how much light each one blocks. Using apps can help you calculate either how long the exposure needs to be, or how many stops of light you need to block for a given outcome.
Remote Shutter Release
A remote shutter release prevents camera shake. Pressing the shutter button manually can cause blur. A remote lets you trigger the shutter without touching the camera. Some remotes have timers. These can be helpful for very long exposures.
Mastering Camera Settings for Long Exposures
Proper camera settings are essential for successful long exposure photography. Composition, focus, and exposure time are vital.
Composition and Focus
First, choose a your composition. Look for foreground interest, leading lines, shapes and textures. Pre-focus your lens before attaching any filters then try not to move it. Use autofocus first. Then, switch to manual focus to lock it in.
Calculating Exposure Time
To calculate exposure time, first determine your base exposure without any filters. Set your camera to aperture priority mode. Choose your desired aperture and ISO. Note the shutter speed the camera selects. Then, use an ND filter calculator app. It will tell you how to adjust the shutter speed based on the filter strength. For example, if your base exposure is 1/60 second and you add a 10-stop ND filter, your new exposure time will be around 16 seconds.
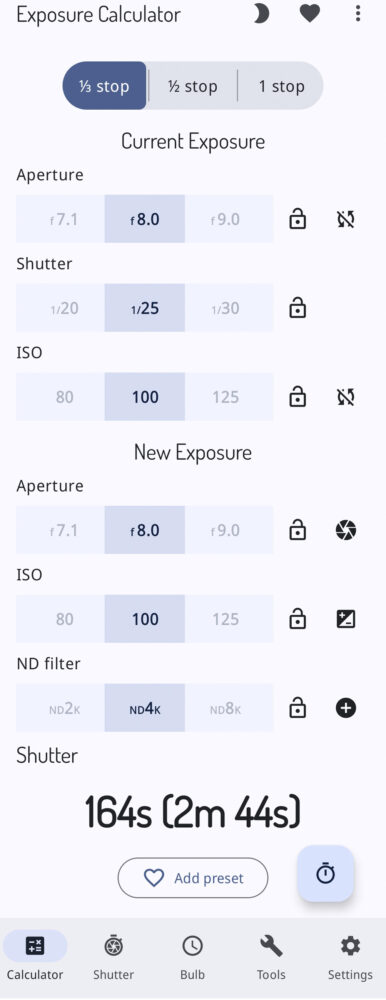
Exposure Calculator App
I use the exposure calculator from Quicosoft. To use the app first you must correctly meter and set for a basic image of the scene. That will give you a base ISO, shutter speed and aperture. From there you can calculate what the shutter speed would be if you added a specific ND filter. However, you can also reverse that to calculate what the exposure would be if you were to put on a lower-strength ND filter or take off an ND filter altogether.
Real World Use
To the right you can see a shutter speed of 1/25th of a second at an aperture of F8 and ISO of 100. Now imagine we have a Neutral Density filter which is marked ND4K. This will reduce the amount of light reaching the sensor by 3.6 stops. To recover that light, WITH ALL OTHER FACTORS EQUAL, the shutter must stay open longer. In this case, the shutter speed needs to change from 1/25th of a second to 164 seconds.
Using Bulb Mode
Bulb mode lets you take exposures longer than 30 seconds. In Bulb mode, the shutter stays open as long as you hold down the shutter button. Use a remote shutter release with a timer. This way, you can control the exposure time precisely. An alternative on newer cameras is to set the exposure time within the menu.
Long Exposure Photography Techniques & Tips
Here are a few tips to help you capture stunning long exposure images.
Shooting Waterfalls and Seascapes
When shooting waterfalls, focus on capturing the motion of the water. Use shutter speeds between 1 and 5 seconds for a smooth, silky effect. For seascapes, consider the movement of the waves. Longer exposures can turn choppy water into a calm, glassy surface.
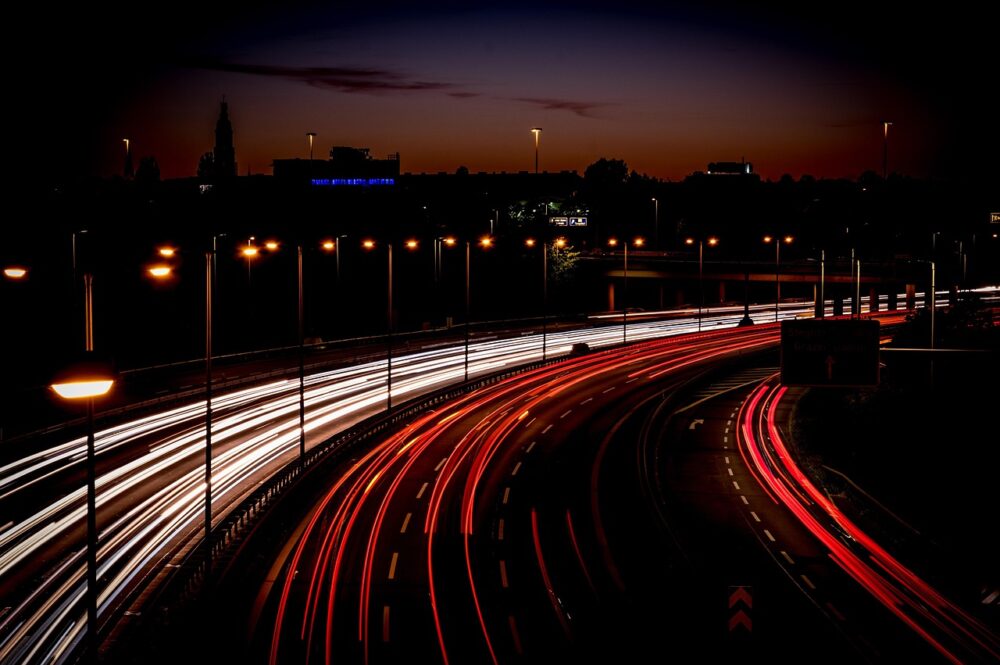
Capturing Light Trails
To capture light trails, find a location with moving lights. City streets at night are perfect. Use a shutter speed of several seconds or even minutes. Experiment with different apertures to control the brightness of the light trails.
Long Exposure in Urban Environments
In urban environments, long exposure can blur crowds. This makes your subject stand out. It also captures architectural details in a unique way. Be aware of light pollution. It can affect your exposure.
Post-Processing Long Exposure Images
Post-processing is essential for refining your long exposure photos.
Basic Adjustments: Contrast, Highlights, Shadows
Start with basic adjustments. Adjust contrast to add depth. Adjust highlights and shadows to recover details.
Noise Reduction
Long exposures often result in noise. This is especially true at high ISO settings. Use noise reduction software to minimize noise. But, be careful not to over-smooth the image.
Sharpening
Sharpen your image to bring out details. Use a sharpening tool in your editing software. Adjust the sharpening amount carefully. Avoid introducing artifacts or halos.
Conclusion
Long exposure photography opens up a world of creative possibilities. With the right gear, settings, and techniques, you can capture dreamy images. Remember to use a tripod. Experiment with ND filters. Master your camera settings. And don’t forget the post-processing. Now grab your camera and start experimenting!
A Selection Of Guide Articles
Why Good Weather Is Bad
The paradox of why good weather is bad and bad weather is good when it comes to getting better results with your landscape photography
Inspiration for Landscape Photography
Find your inspiration for landscape photography in many forms, from peaceful relaxation in nature to visiting galleries or hunting online
Long Exposure Photography
Long exposure photography tips and tricks, understanding filters and the role light plays in choosing the right camera settings
Using Reflections In Landscape Photography
We look at how to best use reflections in landscape photography as the method to add symmetry to you compositions
Adapting A Vehicle For Landscape Photography
We talk about the thought process and steps we took to make life easier when adapting a vehicle for landscape photography
RAW Format Photography
Understanding Camera RAW format files and why they are best for photographers wanting optimal image quality and processing flexibility
Mastering Exposure
Mastering exposure requires understanding of the three principal mechanisms: shutter speed, aperture size, and the photographic material's level of sensitivity to light (ISO)
Essential Filters for Landscape Photography
Read about the essential filters for landscape photography to make your life easier and take your images to the next level